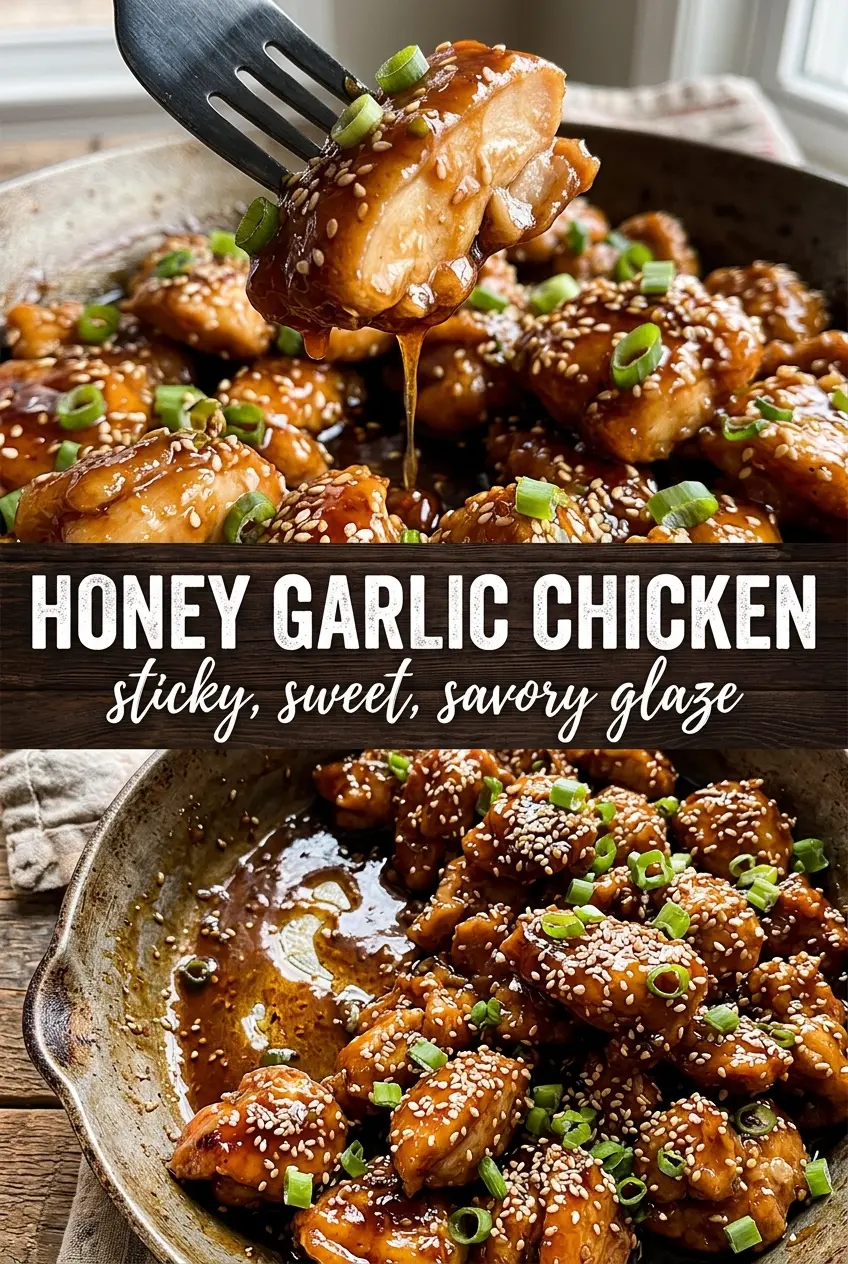
Sticky honey garlic chicken earns its place in the rotation because the sauce clings, caramelizes, and turns glossy instead of disappearing into the skillet. The chicken stays juicy, the edges pick up a little color, and every bite gets that sweet-salty hit with just enough garlic to keep it from tasting flat.
What makes this version work is the order of operations. The chicken gets a hard sear first so you build flavor in the pan, then the garlic goes in briefly so it stays fragrant instead of bitter. The cornstarch slurry thickens the sauce into a real glaze, which matters here because honey alone can go from loose to scorched fast.
Below, I’ll walk through the part that matters most: getting the sauce sticky without turning it grainy or burnt. I’ve also included a few smart swaps and the leftover note I wish more recipes gave you.
The glaze thickened right on cue and coated the chicken instead of running all over the plate. I served it with rice, and my husband kept scraping the pan for the last bits of sauce.
Save this honey garlic chicken for the nights when you want a sticky skillet glaze that clings to every piece.
The Trick to a Sticky Glaze Instead of a Burnt Honey Mess
Honey sauces can fail fast because sugar tightens and scorches before the chicken is done. The fix is to keep the garlic brief, add the liquid ingredients right after, and let the slurry thicken the sauce over a steady simmer instead of cranking up the heat and hoping for the best.
The other thing that matters is the skillet itself. Use a pan with enough surface area for the chicken to sear instead of steam; if the pieces are crowded, they’ll dump moisture into the pan and the sauce will thin out before it has a chance to cling. Once the chicken comes back in, the glaze should look shiny and barely tacky, not watery.
What the Honey, Soy, and Butter Are Each Doing Here

- Honey — This is the body of the glaze and the reason the sauce turns lacquered instead of just savory. Use a regular liquid honey; stronger flavored honeys can take over, and the sauce may taste too floral once it reduces.
- Soy sauce — This gives the chicken salt and depth in one move. Low-sodium soy sauce works fine if that’s what you keep in the pantry, but don’t swap in something much thinner or less salty or the glaze will taste one-note.
- Butter — Butter rounds out the sharp edges and helps the garlic carry through the sauce. You can use a little more oil in a pinch, but you’ll lose that silky finish that makes the glaze cling.
- Cornstarch slurry — This is what turns the pan juices into a real coating sauce. Stir it in after the honey mixture is hot and simmering; if you dump dry cornstarch straight into the pan, it tends to clump and leave little cloudy bits.
- Rice vinegar — The small hit of acid keeps the sauce from tasting candy-sweet. If you don’t have it, use apple cider vinegar in the same amount, but keep it measured so the glaze stays balanced.
Building the Sear Before the Glaze Goes In
Seasoning and Searing the Chicken
Pat the chicken dry before it hits the pan, then season it well with salt, pepper, and garlic powder. Wet chicken steams, and steamed chicken won’t give you the browned surface that makes this dish taste like more than just sweet sauce. Sear over medium-high heat until the first side is deeply golden and the chicken releases from the pan without dragging, then flip and finish cooking until it reaches 165°F.
Cooking the Garlic Without Burning It
Take the chicken out before you start the sauce. The butter and garlic go into the same skillet so you catch the browned bits left behind, but the garlic only needs about a minute. If it goes past fragrant and starts turning dark, the whole sauce will pick up a harsh edge, so add the honey, soy sauce, and vinegar as soon as you smell it bloom.
Thickening to a True Glaze
Stir in the cornstarch slurry and let the sauce simmer for 2 to 3 minutes until it turns glossy and lightly thickened. It should coat the back of a spoon and leave a trail for a second when you drag a spatula through it. If it still looks thin, keep simmering; if it gets too tight, add a spoonful of water to loosen it back up before the chicken returns to the pan.
Finishing the Chicken in the Sauce
Return the chicken to the skillet and turn it through the glaze until every surface is lacquered. Let it cook for another minute or two, just long enough for the sauce to cling and the chicken to rewarm through. Garnish after it comes off the heat so the sesame seeds stay crunchy and the green onions stay bright.
How to Change This Up Without Losing the Sticky Glaze
Use Chicken Thighs for a Richer Result
Boneless skinless thighs work well here and stay juicier if you like darker meat. They may need a few extra minutes in the pan, but the sauce behaves the same way and clings just as well. The flavor ends up a little richer and less lean.
Make It Gluten-Free
Swap the soy sauce for tamari or a certified gluten-free soy sauce in the same amount. The glaze will still reduce the same way, and you won’t lose the savory backbone that balances the honey.
Turn It Into a Dairy-Free Version
Replace the butter with more olive oil or a neutral oil. The sauce will still thicken and coat, but it won’t have the same round, glossy finish, so keep the heat low and let the honey do the work.
Storage and Reheating
- Refrigerator: Store in an airtight container for up to 4 days. The sauce will thicken as it cools, and the chicken will still stay tender.
- Freezer: It freezes well for up to 2 months, though the glaze may separate a little after thawing. Freeze the chicken and sauce together, then thaw overnight in the fridge.
- Reheating: Warm gently in a skillet over low heat with a splash of water to loosen the sauce. High heat is the mistake here; it can make the honey harden and the chicken dry out before the center warms through.
Answers to the Questions Worth Asking
Honey Garlic Chicken
Ingredients
Equipment
Method
- Season the chicken breasts with salt, pepper, and garlic powder to taste. Heat 2 tbsp olive oil in a large skillet over medium-high heat until shimmering, then sear the chicken for 5-6 minutes per side until golden and the internal temperature reaches 165°F.
- Remove the chicken from the skillet and set aside while you make the sauce. Leave any browned bits in the pan for flavor and keep the skillet over medium-high heat.
- In the same pan, cook the minced garlic in 2 tbsp butter for 1 minute until fragrant. Stir constantly so the garlic turns aromatic but doesn’t brown.
- Add honey, soy sauce, and rice vinegar to the skillet and stir to combine. Simmer for 30-60 seconds until the liquid looks cohesive and lightly bubbling.
- Stir in the cornstarch slurry (cornstarch mixed with water). Simmer for 2-3 minutes, stirring, until the sauce thickens to a sticky, glossy glaze.
- Return the chicken to the skillet and turn to coat in the honey garlic glaze. Cook for 1-2 more minutes until the glaze clings and looks deeply amber with light blistering.
- Garnish the chicken with sesame seeds and sliced green onions. Spoon any pooled glaze over the top and serve immediately.
- Serve the honey garlic chicken over steamed rice. Allow the chicken and sauce to rest on the rice briefly so the glaze lightly soaks in before eating.


