Sticky honey garlic chicken earns a permanent spot in the rotation because the skin gets deeply browned before it ever hits the oven, and the sauce clings in a glossy layer instead of pooling thinly on the plate. The sweet-salty glaze turns lacquered in the pan, the garlic softens into the sauce instead of burning, and the chicken stays juicy under that crackly skin.
The trick here is starting with bone-in, skin-on thighs and giving the skin enough time in the skillet to render and crisp. That first sear does the heavy lifting. The oven finish then cooks the chicken through without forcing the sauce to reduce too far on the stove, which is how you keep the honey from tasting scorched and the garlic from going bitter.
Below, I’ll walk through the part that matters most: getting the sauce to thicken enough to coat the chicken without breaking, plus the small swaps that still keep the glaze balanced if you need to adjust the heat or make it gluten-free.
The skin got crisp in the skillet and the sauce turned glossy in the oven without burning. I spooned the pan sauce over rice and my husband kept saying the garlic-honey balance was perfect.
Save this honey garlic chicken for the night you want crisp skin, glossy pan sauce, and dinner on the table fast.
The Part Most Honey Garlic Chicken Gets Wrong
The glaze can go from glossy to burnt faster than people expect. Honey needs enough heat to thicken and cling, but not so much that it caramelizes dry in the pan before the chicken finishes cooking. That’s why the sauce gets built after the sear, then the chicken goes into the oven to finish under a more controlled heat.
The other mistake is flipping too early. Chicken skin won’t release cleanly until it’s rendered and browned enough to pull away from the pan on its own. If you force it, you tear the skin and leave the best part stuck to the skillet instead of on the chicken.
- Bone-in, skin-on chicken thighs — These stay juicy through the oven finish and give you the best chance at crisp skin. Boneless thighs work in a pinch, but they cook faster and won’t give you the same contrast between crackly skin and sticky glaze.
- Honey — This is what makes the sauce cling and shine. Use a standard liquid honey; very dark specialty honeys can taste stronger and edge the sauce toward bitter once they reduce.
- Soy sauce — It brings salt and depth so the glaze tastes more rounded than sugary. Low-sodium soy sauce works well if you want a little more control over the salt level.
- Apple cider vinegar — A small splash keeps the sauce from tasting flat and helps cut through the richness of the chicken skin. If you swap in lemon juice, add it at the end so the acidity stays bright.
What Each Ingredient Is Actually Doing in This Recipe

- Primary ingredient (the star) — Quality matters most. Choose the best you can find.
- Cooking medium (oil, butter, or broth) — This carries flavors and prevents dryness.
- Seasonings (salt, pepper, spices, herbs) — Layer flavors so nothing overpowers. Build depth gradually.
- Aromatics (garlic, onion, herbs) — Cook with fat to bloom flavors. Become the foundation.
- Supporting ingredients — Complement the main ingredient without overpowering it.
- Sauce or liquid (if applicable) — Brings flavors together. Balance richness with acid.
- Acid (lemon, vinegar, wine, or other) — Brightens and prevents flat-tasting results.
- Final finish (garnish, glaze, or sauce) — Prevents one-dimensional taste and adds visual appeal.
What Happens in the Skillet Before the Oven Takes Over
Rendering the Skin
Season the chicken on both sides, then lay the thighs skin-side down in hot olive oil and leave them alone until the skin is a deep golden brown and lifts easily from the pan. You want audible sizzling at the start, then a steadier sound as the fat renders out. If the skin sticks, it isn’t ready yet. Moving it too soon tears the skin and leaves you with soft patches instead of crisp ones.
Building the Glaze
Pull the chicken out briefly and add the butter and garlic to the skillet. Cook just until the garlic smells fragrant, about a minute, because garlic goes from sweet to bitter fast in a hot pan. Stir in the honey, soy sauce, vinegar, and red pepper flakes, scraping up the browned bits from the bottom. That fond is part of the sauce, and it gives the glaze a deeper, more savory edge.
Finishing in the Oven
Return the chicken skin-side up, spoon sauce over the top, and slide the skillet into a 400F oven. The sauce should bubble around the edges and thicken as the chicken finishes cooking. Pull it when the thickest part of the thigh reaches 165F and the juices run clear. If the sauce looks thin at the end, give the chicken a final spooning of pan sauce after it rests instead of boiling the glaze down hard on the stove.
How to Adjust the Glaze Without Losing the Balance
Make it gluten-free with tamari
Swap the soy sauce for tamari in a 1:1 exchange. The sauce keeps the same savory depth and glossy texture, but you’ll avoid the wheat in standard soy sauce. The rest of the recipe doesn’t need to change.
Use boneless thighs for a faster dinner
Boneless, skinless thighs work if that’s what you have, but they’ll cook faster and won’t give you the same crisp exterior. Cut the oven time back a few minutes and watch for an internal temperature of 165F. You’ll still get sticky sauce and tender meat, just with less contrast.
Turn down the heat without losing flavor
Skip the red pepper flakes if you want a milder glaze. The sauce will still taste balanced because the vinegar keeps it from feeling heavy. If you want just a little warmth, use half the flakes and add a pinch at the table instead.
Storage and Reheating
- Refrigerator: Store leftovers in an airtight container for up to 4 days. The skin softens in the fridge, but the sauce keeps the chicken moist.
- Freezer: Freeze cooked chicken thighs and sauce for up to 2 months. Wrap tightly and thaw in the refrigerator before reheating so the glaze doesn’t separate.
- Reheating: Warm covered in a 325F oven until heated through, or reheat gently on the stove with a splash of water to loosen the sauce. High heat dries out the chicken and makes the honey sauce sticky in the wrong way.
Questions I Get Asked About This Recipe
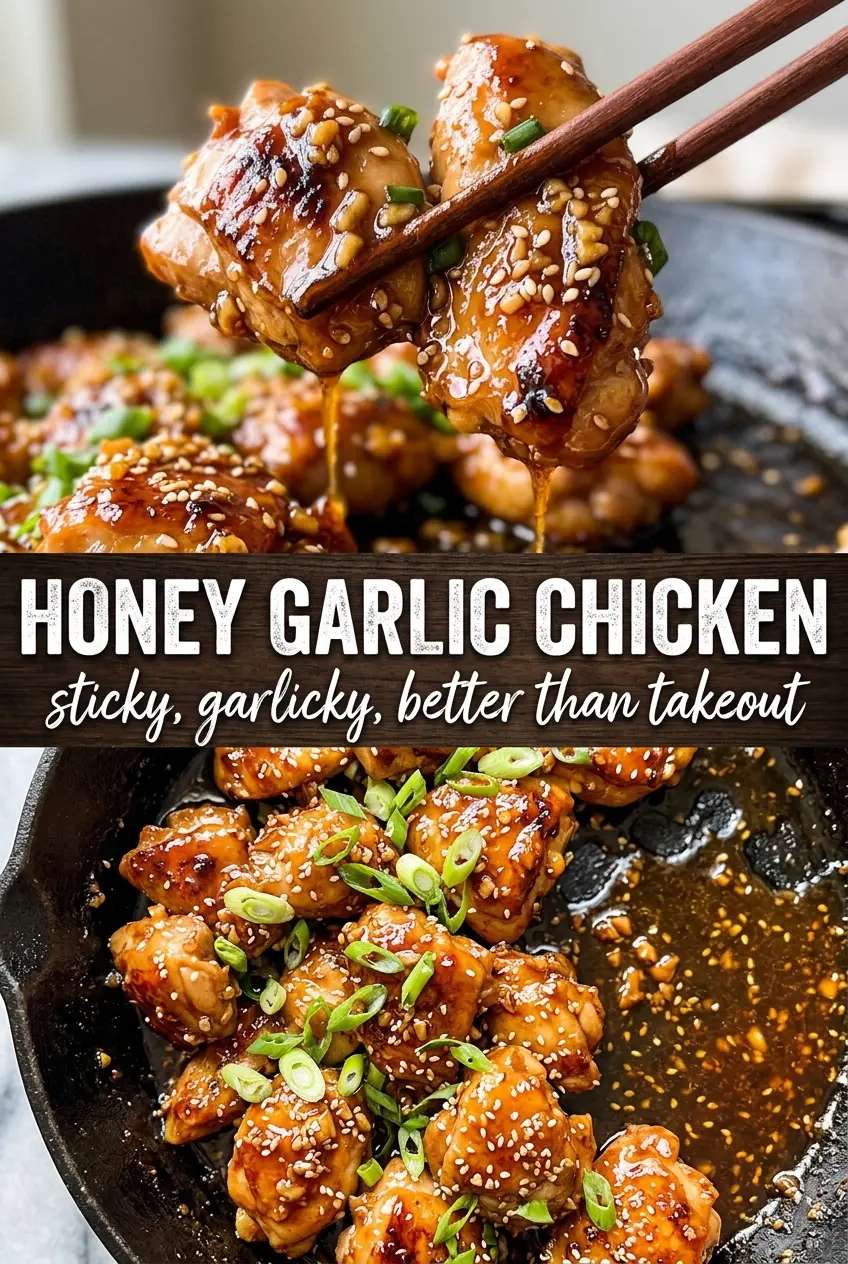
Honey Garlic Chicken
Ingredients
Equipment
Method
- Season the bone-in skin-on chicken thighs with salt and pepper on both sides. Pat lightly so seasoning adheres.
- Heat the olive oil in a large oven-safe skillet over medium-high heat. Sear the chicken skin-side down for 5-6 minutes until deeply golden with crisp-looking skin.
- Flip the chicken briefly and remove from the pan. The underside should be just lightly browned.
- Add the unsalted butter and minced garlic to the pan and cook for 1 minute until fragrant. Stir so the garlic turns fragrant without darkening.
- Stir in the honey, soy sauce, apple cider vinegar, and red pepper flakes. Mix until combined and glossy, with small bubbles starting to form.
- Return the chicken skin-side up and spoon the sauce over. The chicken should be partially coated and the glaze should visibly cling.
- Transfer the skillet to a 400F oven and bake for 15-18 minutes until the internal temperature reaches 165F. The sauce should thicken and the chicken should look lacquered.
- Spoon the pan sauce over the chicken and garnish with fresh thyme and sesame seeds. Serve right away while the glaze is shiny.


