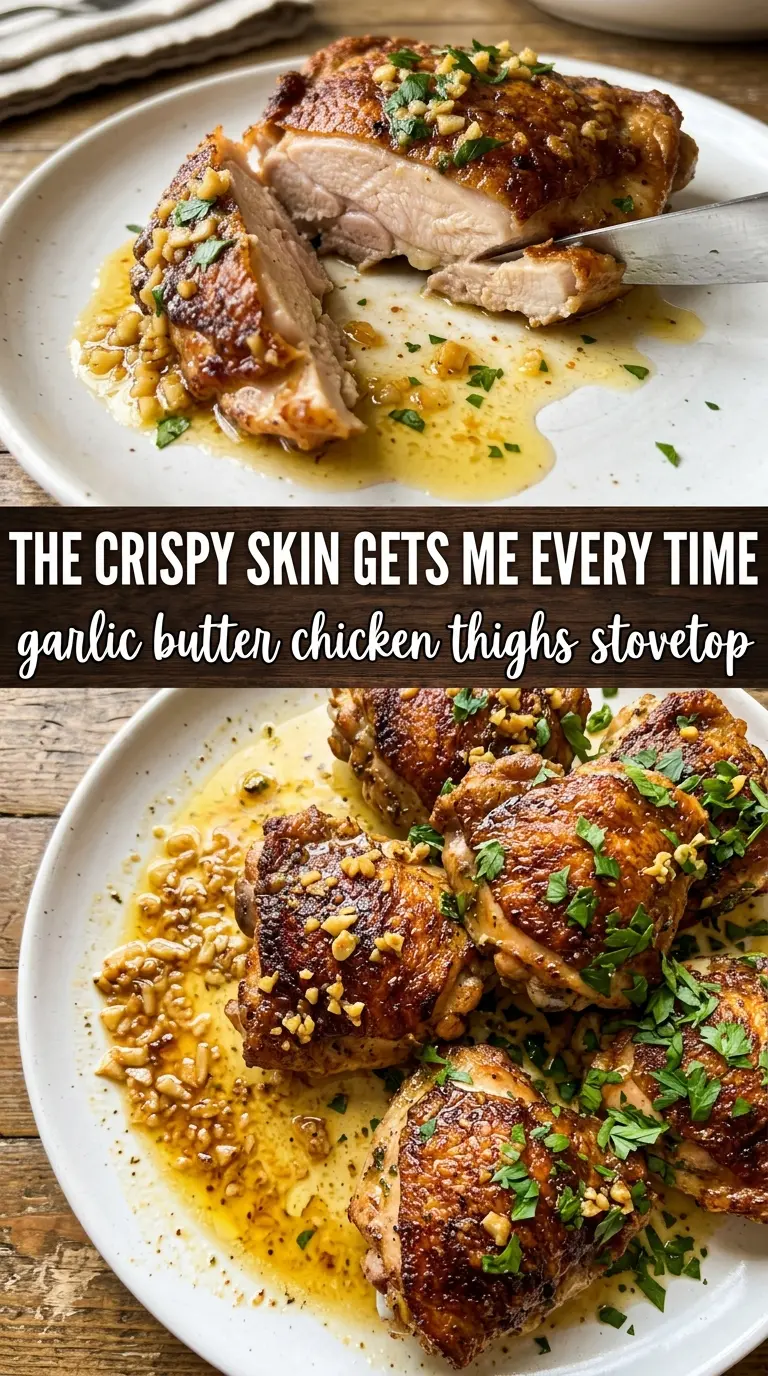
Garlic butter chicken thighs earn their place on the table fast: crisp, deeply browned skinless chicken, a pan sauce that tastes like it came from a restaurant, and enough garlicky butter to soak into every bite. The trick is that the chicken gets its own serious sear before the butter ever hits the pan, so the flavor starts with browning instead of relying on sauce alone.
That matters here because butter can scorch if it’s asked to do too much. I build the color first with oil, then drop the heat and let the garlic, thyme, and rosemary perfume the butter without burning. By the time the chicken goes back in, the pan is full of flavor and the sauce is ready to cling instead of separate.
Below, I’ll walk through the part that matters most: getting the garlic golden, not bitter, and basting the chicken so the butter actually coats the meat instead of sitting at the bottom of the skillet. There’s also a practical note on swaps, storage, and what to do if your thighs are bone-in instead of boneless.
The chicken came out golden and juicy, and the garlic butter thickened just enough to spoon over everything without turning greasy. I used the lemon at the end and it pulled the whole skillet together.
Save these garlic butter chicken thighs for the nights when you want a skillet dinner with crisp edges, juicy centers, and a spoonable pan sauce.
The Sear Is Doing More Work Than the Butter
The biggest mistake with garlic butter chicken is rushing the sauce before the chicken has color. If the pan starts pale, the final dish tastes flat no matter how much butter you add. Browning the thighs first gives you that savory, almost roasted base that keeps the sauce from tasting one-note.
Another thing that matters here is heat control. Garlic needs a short, gentle cook in the butter; if the butter is screaming hot, the garlic goes from fragrant to bitter fast. That’s why the heat drops before the aromatics go in, and why the chicken comes back to the pan only after the butter has picked up the herb flavor.
- Chicken thighs — Boneless, skinless thighs cook fast and stay juicy in a skillet. Bone-in thighs work too, but they need more time and a slightly lower heat so the outside doesn’t overcook before the center is done.
- Butter — This is the sauce, so use real unsalted butter. Salted butter works in a pinch, but it makes seasoning harder to control after the garlic and lemon go in.
- Garlic — Fresh garlic matters here because it perfumes the butter in a way jarred garlic just doesn’t. Smash the cloves instead of mincing them so they flavor the fat without disappearing or burning too fast.
- Thyme and rosemary — These herbs hold up in hot butter and give the skillet its backbone. Dried herbs will work, but use less; they’re more concentrated and can taste dusty if you overdo them.
- Lemon wedges — The lemon is not optional in practice. A squeeze at the end cuts the richness and makes the butter taste brighter instead of heavy.
What Each Ingredient Is Actually Doing in This Recipe
- Primary ingredient (the star) — Quality matters most. Choose the best you can find.
- Cooking medium (oil, butter, or broth) — This carries flavors and prevents dryness.
- Seasonings (salt, pepper, spices, herbs) — Layer flavors so nothing overpowers. Build depth gradually.
- Aromatics (garlic, onion, herbs) — Cook with fat to bloom flavors. Become the foundation.
- Supporting ingredients — Complement the main ingredient without overpowering it.
- Sauce or liquid (if applicable) — Brings flavors together. Balance richness with acid.
- Acid (lemon, vinegar, wine, or other) — Brightens and prevents flat-tasting results.
- Final finish (garnish, glaze, or sauce) — Prevents one-dimensional taste and adds visual appeal.
Getting the Chicken Golden Before the Butter Goes In
Seasoning and Prepping the Thighs
Season the chicken generously on both sides and let the salt sit while the skillet heats. That gives the surface time to dry out a little, which helps the chicken brown instead of steam. If the thighs look wet when they hit the pan, they’ll stick and pale at the edges before they ever develop color.
The First Sear
Heat the olive oil over medium-high and lay the chicken in with some space between each piece. You want a steady sizzle the second the meat touches the pan; if it’s silent, the pan isn’t hot enough. Let the chicken cook undisturbed until it releases easily and turns a deep golden brown, then flip and finish the second side.
Building the Garlic Butter
Once the chicken comes out, lower the heat before adding the butter, garlic, thyme, and rosemary. The butter should foam, not smoke, and the garlic should turn pale gold around the edges. If it darkens quickly, the pan is too hot; pull it off the burner for a few seconds before moving on.
Basting for a Glossy Finish
Return the chicken to the skillet and spoon the butter over the top again and again for about two minutes. Tilt the pan so the butter pools on one side, then scoop it over the chicken; that’s what gives you the shiny finish and keeps the herbs moving through the sauce. The chicken is done when it reaches 165F and the juices run clear, not pink.
What to Change When You Need a Different Version
Bone-In Thighs Instead of Boneless
Bone-in thighs bring more flavor and stay juicy, but they take longer. Lower the heat a touch after the first sear so the outside doesn’t overbrown before the center reaches temperature. Expect a few extra minutes per side, and use the thermometer instead of guessing.
Dairy-Free Garlic Herb Chicken
Use a good plant-based butter if you need to skip dairy. You’ll lose a little of the round, rich finish that real butter gives, but the garlic, herbs, and browned chicken still carry the dish well. Keep the heat gentle so the substitute fat doesn’t separate.
Extra Lemon and No Rosemary
If rosemary isn’t your thing, skip it and lean into thyme and lemon. The dish gets lighter and a little cleaner tasting, which works well if you want the garlic to stand out more. Add the lemon at the very end so the butter stays smooth.
Storage and Reheating
- Refrigerator: Store leftovers in an airtight container for up to 4 days. The butter will firm up, so expect the sauce to look thicker when cold.
- Freezer: Freeze cooked chicken for up to 2 months, though the butter sauce won’t be quite as silky after thawing. Wrap well and thaw in the fridge before reheating.
- Reheating: Warm gently in a skillet over low heat with a splash of water or broth. High heat dries out the chicken and can split the butter sauce, which is the fastest way to ruin the texture.
Questions I Get Asked About This Recipe

Garlic Butter Chicken Thighs
Ingredients
Equipment
Method
- Season the chicken thighs generously with salt and pepper on both sides.
- Heat the olive oil in a large heavy skillet over medium-high heat, then add the chicken and sear for 5-6 minutes per side until golden and cooked through to 165°F.
- Remove the chicken and set aside while you make the garlic butter.
- Reduce the heat to medium, then add the butter, garlic, thyme, and rosemary to the skillet.
- Cook until the butter foams and the garlic turns golden, about 2 minutes.
- Return the chicken to the pan, tilt the skillet, and use a spoon to baste the chicken repeatedly with the garlic butter for 2 minutes.
- Serve immediately with the garlic butter spooned over the chicken and with lemon wedges on the side.