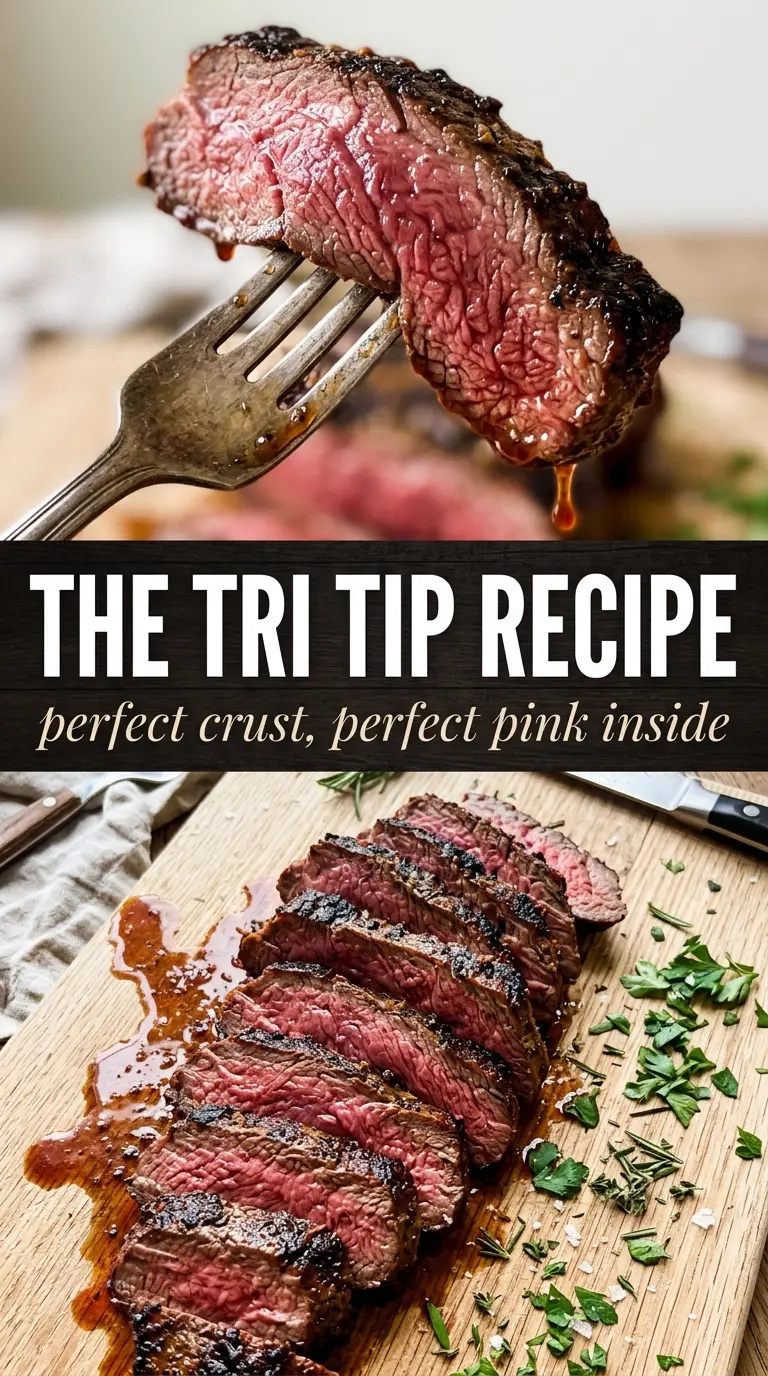
Tri-tip comes off the grill or out of the oven with a deep, peppery crust and a pink center that slices cleanly if you give it the right rest. It’s the kind of roast that feels a little special without asking for much more than a solid seasoning rub and attention to temperature. The payoff is a beefy, juicy main dish that works as well for a casual barbecue as it does for a quieter dinner at home.
What makes this version dependable is the simple rub and the two-stage cook. Salt, pepper, garlic powder, paprika, onion powder, and oregano build a crust that tastes like it had a lot more going on than it did, while the olive oil helps the seasoning cling and encourages browning. Tri-tip is lean enough that overcooking turns it dry fast, so the real job here is pulling it at 130-135°F and slicing it against the grain after a proper rest.
Below, I’ve laid out the small details that matter most: how to handle the cut before cooking, how to keep the center pink whether you grill or roast it, and what to change if you want to lean more Santa Maria style or adjust for your own setup.
The spice rub formed a fantastic crust, and pulling it at 132°F gave me the exact pink center I was hoping for. Slicing it against the grain made every piece tender instead of chewy.
Save this tri-tip recipe for the night you want a crusty seared exterior and a pink, tender center without guessing at doneness.
The Trim-and-Thermometer Problem Most Tri-Tip Recipes Skip
Tri-tip fails for two predictable reasons: people overcook it, or they slice it the wrong way. The cut has a noticeable grain that changes direction, and if you cut with it, even a perfectly cooked roast can eat tough. Read the roast before it goes on the heat, then pay attention when you slice it at the end.
The other mistake is treating color as a better guide than temperature. Tri-tip carries on cooking after it leaves the heat, especially if you’ve seared it hard first. Pulling it at 130-135°F gives you a medium-rare center after the rest, while still leaving enough browning on the outside to taste like a proper roast.
- Grain direction — Look at the roast before seasoning it so you know where the grain runs. If the grain shifts, turn the roast and slice each section across its own grain for the most tender result.
- Target temperature — 130-135°F is the sweet spot for medium-rare after resting. If you cook much past that, tri-tip starts losing the juiciness that makes it worth buying.
- Resting time — The 15-minute rest isn’t optional. It keeps the juices from running out the second you slice in.
What the Rub Is Doing Before the Heat Ever Hits
- Tri-tip roast — This cut has enough beefy flavor to stand up to a bold rub, but it’s lean enough that timing matters. A 3-pound roast is a good size for the grill or oven and feeds a crowd once sliced.
- Olive oil — The oil helps the rub stick and promotes browning on the surface. You don’t need much, just enough to coat the roast evenly.
- Kosher salt — Salt does more than season the surface; it helps the meat taste seasoned all the way through. Table salt works in a pinch, but use less because it’s denser.
- Paprika and garlic powder — These give the crust color and the kind of savory backbone that makes the roast taste seasoned from the first bite. Smoked paprika shifts it toward a barbecue feel if that’s the direction you want.
- Dried oregano — This is the quiet ingredient that makes the rub taste less flat. It leans a little Santa Maria style without overpowering the beef.
The Sear, Roast, and Rest That Give You a Pink Center
Seasoning the Roast Evenly
Mix the salt, pepper, garlic powder, paprika, onion powder, and oregano before you touch the meat so the rub goes on evenly. Coat the tri-tip with olive oil first, then press the seasoning all over the surface instead of dusting it on loosely. If the rub looks patchy, the crust will cook patchy too. Let the roast sit at room temperature for about 30 minutes so the chill comes off the outside and the meat cooks more evenly.
Grilling Over Direct Then Indirect Heat
Start with high heat to sear each side for about 5 minutes. You’re looking for a dark crust and good grill marks, not a fully cooked roast at this stage. After that, move it to indirect heat and keep cooking until the center reaches 130-135°F. If the flame stays under the meat the whole time, the outside will overbrown before the center gets where it needs to be.
Roasting in a Hot Skillet and Oven
For the oven version, sear the tri-tip in a hot skillet first so you build color before it goes into the oven. Then roast at 425°F for 20-25 minutes, watching the internal temperature instead of the clock once you get close. If your skillet isn’t hot enough at the start, you’ll lose the crust that makes this method worth using. The roast should come out with a deeply browned exterior and a center that still feels springy when pressed lightly.
Resting and Slicing Against the Grain
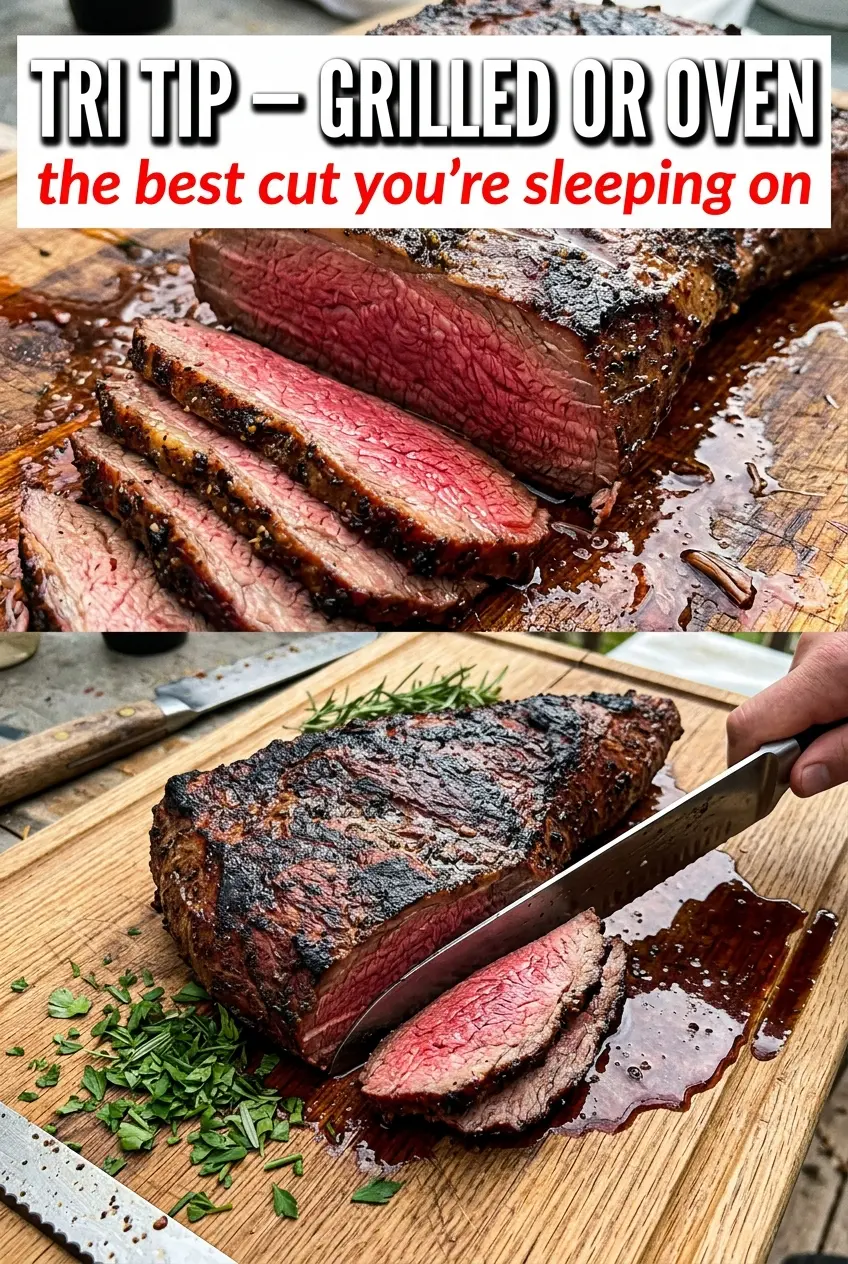
Let the roast rest for 15 minutes before slicing. This is when the juices settle back into the meat instead of flooding the cutting board. Slice against the grain with a sharp knife, and if the grain changes direction, adjust your cutting angle with it. This is the step that turns a good tri-tip into one that eats tender all the way through.
How to Adjust Tri-Tip for Your Grill, Oven, or Spice Cabinet
Santa Maria style with more smoke
Add a little smoked paprika or grill over oak or charcoal if you want a more traditional barbecue edge. The meat stays the same, but the flavor reads deeper and a touch smokier.
Dairy-free and naturally gluten-free as written
This recipe already works for both diets without any swaps. Keep an eye on any bottled seasoning additions you might be tempted to use, since some blends hide flour or dairy powders.
If you want a milder crust
Cut the black pepper back slightly and add a little more paprika. You’ll still get a good crust, but the finished roast will lean more savory than sharp.
Storage and Reheating
- Refrigerator: Store sliced tri-tip in an airtight container for up to 4 days. It stays tender best when kept with any juices.
- Freezer: It freezes well for about 2 months. Wrap slices tightly and thaw in the fridge so the texture stays closer to fresh.
- Reheating: Warm gently in a covered skillet with a splash of beef broth or reheat low and slow in the oven. High heat dries out the edges fast, especially on lean tri-tip.
Answers to the Questions Worth Asking
Tri Tip - Grilled or Oven-Roasted
Ingredients
Equipment
Method
- Mix kosher salt, black pepper, garlic powder, paprika, onion powder, and dried oregano in a bowl to make the rub.
- Rub the tri-tip with olive oil, then coat generously with the spice rub so it adheres in an even layer.
- Let the tri-tip sit at room temperature for 30 minutes so the seasoning clings and the meat takes on flavor.
- Sear the tri-tip over high heat for 5 minutes per side to form a crust.
- Move to indirect heat and cook until the internal temperature reaches 130-135°F for medium-rare.
- Sear the tri-tip in a hot skillet to develop a browned crust before roasting.
- Roast at 425°F for 20-25 minutes, until the internal temperature reaches 130-135°F for medium-rare.
- Rest the tri-tip for 15 minutes to let juices redistribute before cutting.
- Slice against the grain to keep each piece tender and show the pink, medium-rare interior.


