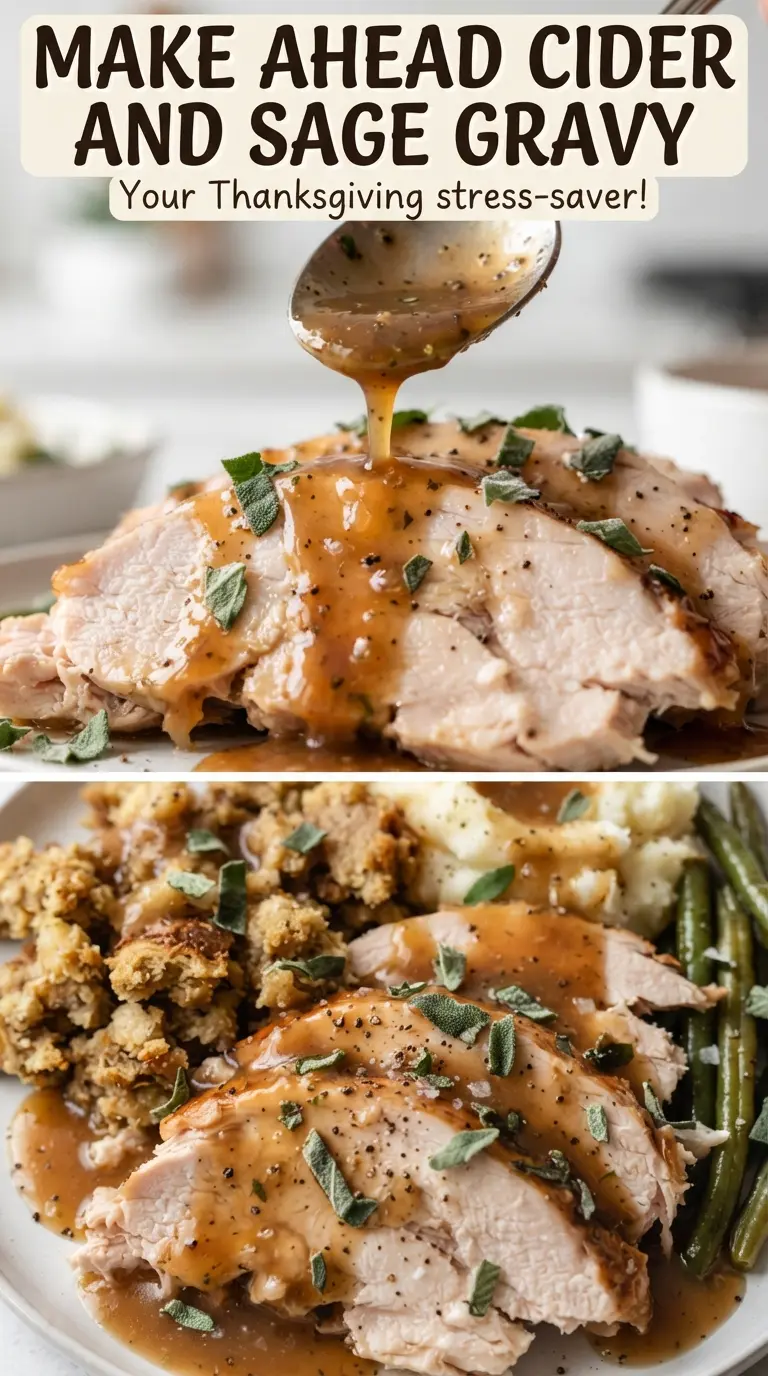
Glossy cider and sage gravy has a way of making the whole table feel more complete. It tastes deep and savory from the roasted turkey wings, but the apple cider keeps it from landing heavy or flat. The result is a gravy that pours smoothly, clings to mashed potatoes, and still has enough brightness to wake up turkey, stuffing, or biscuits.
The trick is building flavor in layers instead of trying to fix bland gravy at the end. Roasting the turkey pieces with the vegetables gives you browned edges and drippings that turn into a richer stock, while the cider adds gentle fruitiness that cooks down into something round and balanced. The flour cooks in butter until it turns lightly golden, which keeps the gravy from tasting pasty or raw.
Below, I’ve included the small details that matter most: how dark to roast the bones, why the cider vinegar goes in at the end, and what to do if the gravy thickens too much after chilling. That last part matters more than people think, especially when you’re making gravy ahead.
The gravy thickened up beautifully after chilling, and the cider gave it a clean finish that kept it from tasting heavy. I whisked in a splash of the pan drippings when I reheated it, and it was silky on the first pour.
Save this make-ahead cider and sage gravy for the meal when you want deep roasted flavor and a smooth, pourable finish.
The Part Most Gravy Gets Wrong: Building Flavor Before the Roux
Gravy tastes thin when the base never had a chance to develop. Browning the turkey wings, onion, carrots, and celery in a hot oven gives you the roasted flavor that store-bought stock can’t fake, and that step is doing more work than the roux ever will. If the pan looks dark at the bottom, that’s a good sign; those browned bits loosen into the simmering liquid and carry the whole batch.
The other mistake is rushing the flour. A pale roux can thicken, but it tastes raw and can leave the gravy slightly chalky. Cooking the butter and flour until the mixture turns golden brown gives you a nutty, toasted backbone that stands up to the cider and sage instead of getting buried under them.
- Roasted turkey wings or drumsticks — These give the stock body, collagen, and a deeper savory flavor than chicken alone. Wings are a little easier to fit in the pan, but drumsticks work just as well if that’s what you can find.
- Apple cider — Use real cider, not apple cider vinegar and not sparkling cider. It cooks down into gentle sweetness and adds brightness without turning the gravy sugary.
- Fresh sage and thyme — Fresh herbs stay cleaner and more aromatic here than dried. If you need to use dried, cut the amount in half and add it with the stock so it has time to soften.
- Butter and flour — This is the structure of the gravy, and the butter has to fully coat the flour so the sauce thickens smoothly. Don’t swap in oil here unless you’re making a dairy-free version; butter gives the finished gravy a rounder taste.
How to Keep the Gravy Smooth, Glossy, and Not Too Sweet
- Turkey wings or drumsticks — Browned turkey gives the gravy its main savory note and enough natural gelatin to make it feel lush instead of watery. If you swap in chicken pieces, the gravy will still work, but the flavor will be a little lighter.
- Chicken broth — Use a broth you’d actually drink on its own. A weak broth makes a weak gravy, and there’s no shortcut around that once the stock is strained.
- Apple cider vinegar — This is the finish that keeps the gravy from tasting sweet or dull. Stir it in at the end so the brightness stays sharp instead of cooking off.
- Fresh sage — Sage can take over fast, so chop it finely and cook it briefly in the butter. That short bloom pulls out the earthy, piney note without letting it turn bitter.
The Roast, Simmer, Roux, and Finish That Actually Matter
Roasting the Turkey and Vegetables
Heat the oven to 425F and roast the turkey wings, onion, carrots, and celery until the edges are deeply browned, not just tan. You want the vegetables softened and the turkey skin darkened, with browned drippings stuck to the pan. If the tray looks pale at 45 minutes, give it more time; pale bones make pale gravy.
Drawing the Flavor Into the Stock
Move everything to a pot, add the broth and cider, and simmer for 30 minutes. The liquid should take on a deeper color and smell savory with a light apple note. Strain it well, because loose bits will make the finished gravy cloudy and can leave a grainy texture later.
Cooking the Roux Until It Tastes Nutty
Melt the butter, add the sage and thyme, and let them sizzle for about a minute. Whisk in the flour and keep it moving for 3 to 4 minutes until it turns golden brown and smells toasted. If it still smells like raw flour, it’s not ready, and the gravy will carry that taste.
Whisking in the Stock Without Lumps
Add the stock gradually while whisking. At first it will look thin and a little messy, then it will smooth out as it heats. Don’t dump the liquid in all at once unless you want floury clumps that never fully disappear.
Finishing for Balance
Simmer the gravy for 8 to 10 minutes until it coats a spoon, then stir in the vinegar and season with salt and pepper. If it thickens too much after chilling, whisk in a splash of broth or drippings while reheating. The gravy should pour in a ribbon, not plop out of the spoon.
Three Ways to Adapt This Gravy Without Losing What Makes It Good
Dairy-Free Version
Swap the butter for a neutral dairy-free baking fat or olive oil, then cook the roux a touch longer to get some toasted flavor back. The gravy will still thicken well, but it won’t have quite the same rounded richness, so the final seasoning matters even more.
Gluten-Free Gravy
Use a 1:1 gluten-free flour blend in place of the all-purpose flour and whisk carefully as it cooks. The texture is slightly less silky than a wheat roux, but it still gives a smooth, spoonable gravy if you simmer it long enough.
No Turkey Bones on Hand
Use extra chicken wings or a mix of wings and drumsticks if you can’t get turkey. You’ll lose a little of the holiday-style depth, but the cider, sage, and long simmer still give you a gravy with enough character to work on a weeknight table.
Make It Ahead for a Crowd
This gravy is built for advance prep. Chill it up to 3 days, then reheat it slowly and whisk in any pan drippings right at the end for a fresher, more layered taste.
Storage and Reheating
- Refrigerator: Store in a covered container for up to 3 days. It will thicken as it chills.
- Freezer: It freezes well for up to 2 months. Cool it completely first, then leave a little space at the top of the container for expansion.
- Reheating: Warm over medium-low heat and whisk often. If it looks too thick or slightly jellied, add broth a splash at a time so it loosens without turning thin.
Answers to the Questions Worth Asking

Make Ahead Cider and Sage Gravy
Ingredients
Equipment
Method
- Preheat the oven to 425F. Toss the turkey wings or drumsticks, onion, carrots, and celery with olive oil, then spread on a sheet pan.
- Roast at 425F for 45 minutes until deeply browned. Look for dark, caramelized edges on the turkey and vegetables.
- Transfer the roasted turkey and vegetables to a pot, then add chicken broth and apple cider. Bring to a gentle simmer.
- Simmer for 30 minutes, then strain and keep the stock. Keep the aromatics out so the gravy stays smooth.
- Melt butter in a saucepan, then add fresh sage and fresh thyme leaves. Cook for 1 minute until fragrant.
- Whisk in all-purpose flour and cook for 3-4 minutes until golden brown. The roux should look smooth and smell toasted.
- Gradually whisk the strained stock into the roux. Simmer for 8-10 minutes, stirring occasionally until thick and smooth.
- Stir in apple cider vinegar and season with salt and pepper. Taste and adjust until the flavor pops.
- Cool the gravy, then refrigerate up to 3 days. Chill until set and easy to reheat.
- Reheat over medium heat, whisking until smooth. If you have pan drippings, whisk them in for extra turkey flavor.