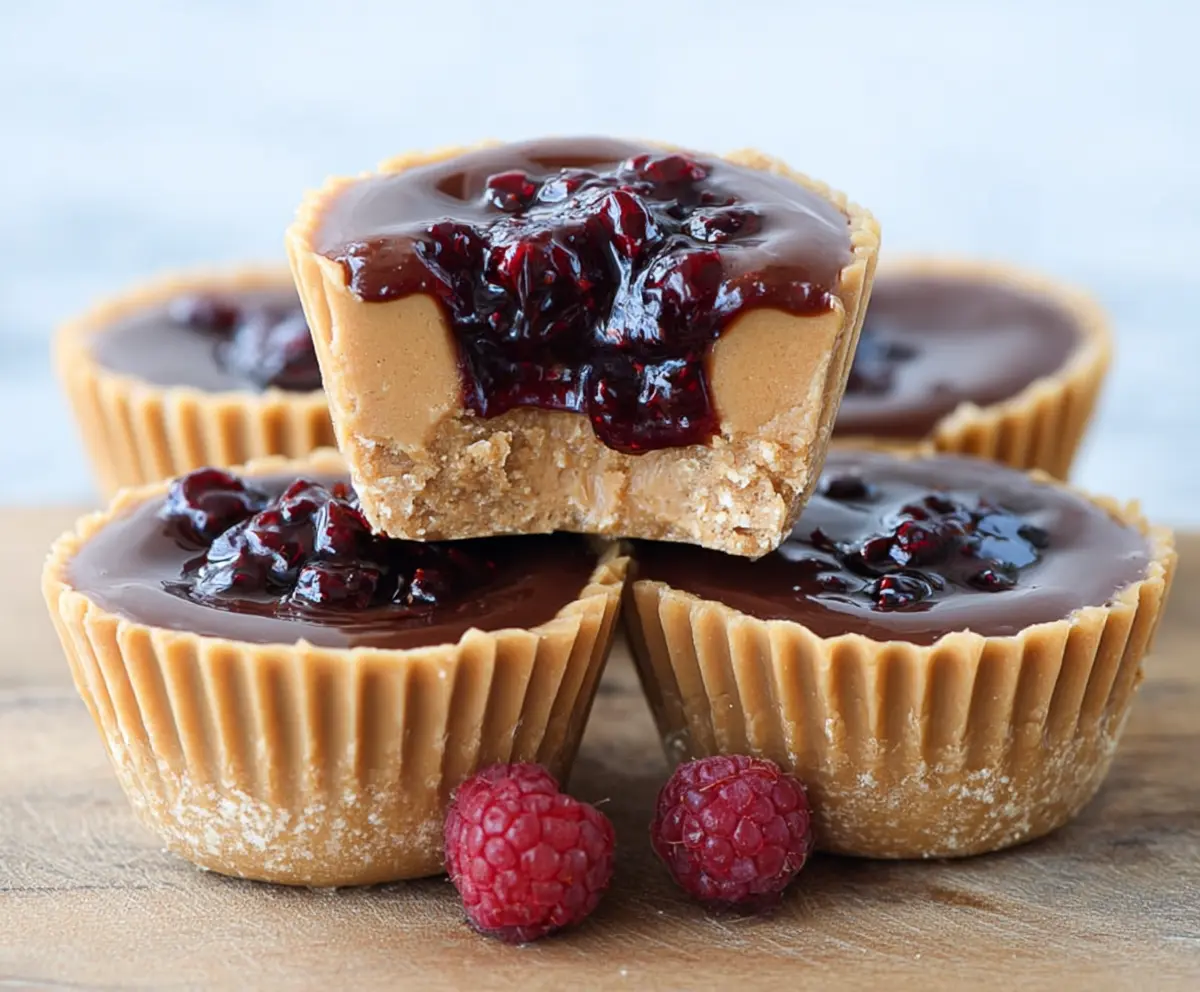
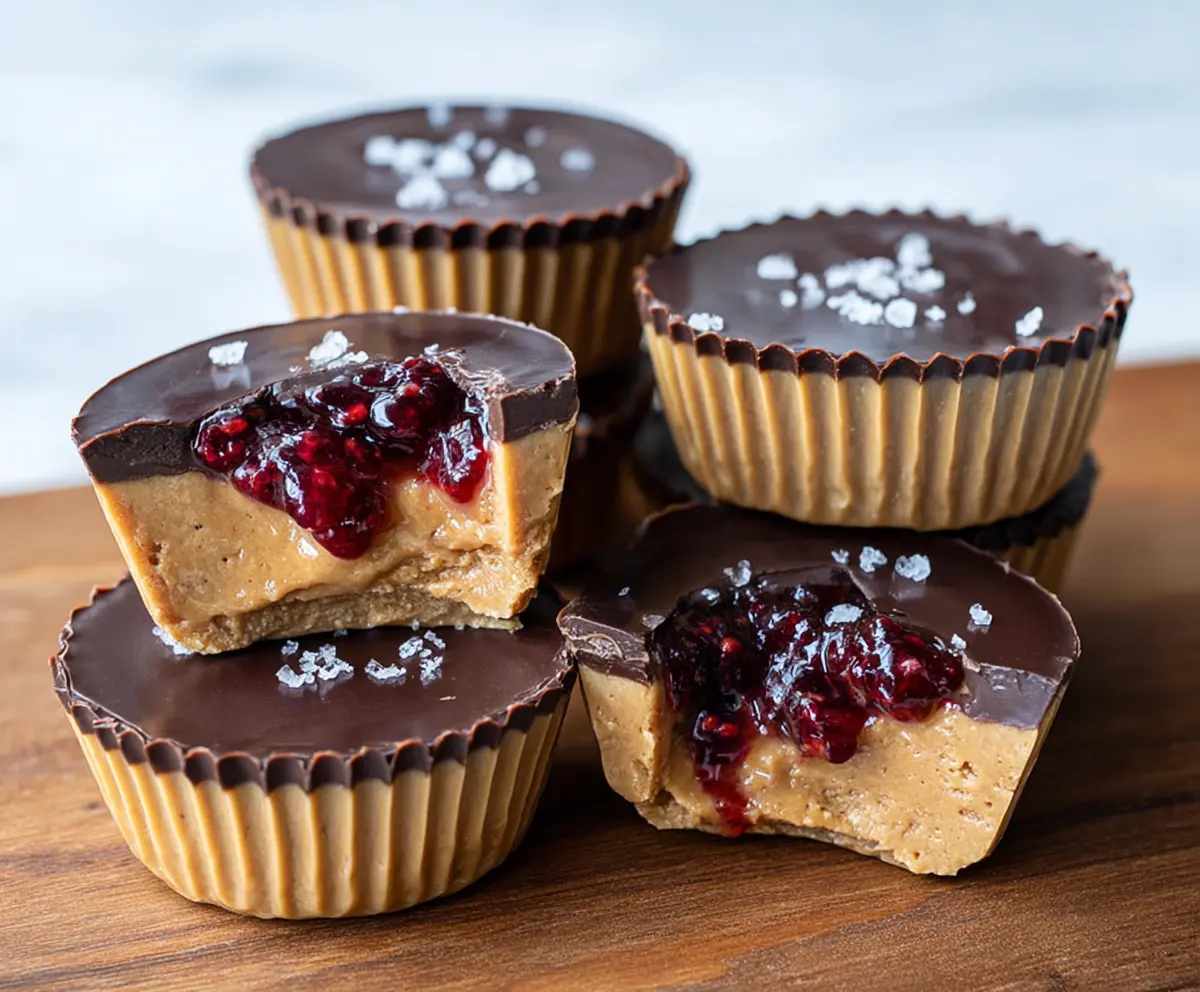
These Healthy Peanut Butter and Jelly Cups are a fun twist on the classic snack! They have creamy peanut butter inside a tasty chocolate shell, paired with sweet jelly for a yummy treat.
Making these cups is a breeze! I love how I can satisfy my sweet tooth without the guilt. Plus, they make a perfect little snack for anytime—just try not to eat them all at once! 😋
Key Ingredients & Substitutions
Natural Peanut Butter: Choose creamy for a smooth texture or crunchy for some bite. If you’re allergic to peanuts, almond or sunflower butter work great too!
Coconut Flour: This adds texture and helps bind the mixture. If you don’t have any, you can substitute with almond flour, but you might need a little more since coconut flour is more absorbent.
Maple Syrup or Honey: These natural sweeteners keep the cups healthy. Maple syrup is vegan, while honey adds a lovely flavor. Agave syrup can be used if you need a vegan alternative!
Dark Chocolate: I love using 70% cocoa for a rich taste without too much sugar. You can swap it for milk chocolate if you prefer a sweeter option.
Berry Jam: I suggest using no-sugar-added jam for a healthier treat. You can also use homemade jam or even fresh fruit if you like it more natural!
How Do I Ensure My Peanut Butter Cups Are Perfectly Layered?
Layering is key to making these cups look and taste great! Follow these steps for perfect results:
- Press the peanut butter mixture firmly into the molds. This creates a strong base that won’t crumble when you take it out.
- Let it freeze for a bit before adding chocolate. Freezing helps it set so the layers stay distinct.
- Cover the sides with melted chocolate first, letting it freeze again briefly to harden. This creates a solid layer around the peanut butter.
- When adding the jam, don’t overfill! Just a teaspoon keeps it from spilling over once you add the top chocolate layer.
Taking your time with each step yields the best results, making these cups as tasty as they are pretty!
Healthy Peanut Butter and Jelly Cups
Ingredients:
- 1 cup natural peanut butter (creamy or crunchy)
- 1/4 cup coconut flour (for texture and slight firmness)
- 2 tablespoons maple syrup or honey (natural sweetener)
- 1/4 teaspoon sea salt
- 1 teaspoon vanilla extract
- 1/2 cup dark chocolate chips or chopped dark chocolate (70% cocoa or higher)
- 1 teaspoon coconut oil (to help melt the chocolate smoothly)
- 1/3 cup raspberry or mixed berry jam (preferably no-sugar-added or homemade)
- Fresh raspberries, optional for garnish
How Much Time Will You Need?
Preparing these delightful cups takes about 15 minutes of hands-on time, plus a total of 45 minutes to chill in the freezer. This means you’ll have a tasty snack ready in just under an hour!
Step-by-Step Instructions:
1. Make the Peanut Butter Mixture:
In a mixing bowl, combine the natural peanut butter, coconut flour, maple syrup (or honey), sea salt, and vanilla extract. Stir everything together until the mixture thickens and holds together well. It should feel moldable but not too dry, so adjust with a bit more peanut butter or coconut flour if needed!
2. Prepare the Molds:
Line a muffin tin with silicone liners or use a silicone mold. These will make it super easy to remove the cups once they’re set. If you’re using a metal muffin tin, consider spraying it lightly with cooking spray.
3. Shape the Base:
Spoon the peanut butter mixture evenly into the 8-10 cupcake molds. Press the mixture firmly into each mold, creating a sturdy base layer and making sure to push it up the sides a bit to hold in the filling later. This step is important for creating that perfect little cup shape!
4. Chill the Base:
Place the filled molds in the freezer and let them chill for about 15 minutes. This will help them firm up nicely so they don’t fall apart when you add the chocolate.
5. Melt the Chocolate:
While the cups are chilling, melt the dark chocolate and coconut oil together. You can do this in a small saucepan over low heat, stirring frequently until melted and smooth, or use the microwave in short bursts, stirring in between.
6. Create the Chocolate Shell:
Once the peanut butter cups are firm, take them out of the freezer. Carefully spread a layer of the melted chocolate on the inside sides of each cup to create a hard shell effect. Make sure it’s well coated, then pop them back into the freezer for about 5 minutes to set.
7. Add the Jam:
Now it’s time for the fun part! Spoon about 1 teaspoon of berry jam into the center of each peanut butter cup. Don’t overfill to avoid spilling when you add the last layer of chocolate.
8. Seal with Chocolate:
Top the jam with the remaining melted chocolate, smoothing it out carefully to seal in the jam beneath. Make sure the chocolate covers the jam completely so it doesn’t ooze out when you bite into it!
9. Final Chill:
Return the filled cups to the freezer for at least 30 minutes, allowing them to fully set. This will help the chocolate harden and keep everything together perfectly.
10. Serve and Enjoy!
Once fully set, carefully remove the peanut butter and jelly cups from the molds. If you used silicone liners, they should pop out easily! For a sweet touch, garnish with fresh raspberries if desired. You’re all set to enjoy these healthy, naturally sweet, and creamy peanut butter and jelly treats!
11. Storing Leftovers:
Store any leftovers in an airtight container in the refrigerator for up to a week, or in the freezer for longer storage. Just pop one out when you need a quick snack!
Enjoy your delicious, homemade Healthy Peanut Butter and Jelly Cups!
Can I Use Liquid Sweeteners Instead of Maple Syrup or Honey?
Yes, absolutely! If you prefer, you can use agave nectar or stevia as liquid sweeteners. Just be sure to adjust the amount to taste since some sweeteners are more concentrated than others.
What If I Don’t Have Coconut Flour?
No worries! You can substitute with almond flour, though you may need a little more since coconut flour absorbs more moisture. Start with the same amount and add a bit until the mixture holds together.
How Do I Make These Cups Dairy-Free?
To keep the recipe dairy-free, ensure you use dairy-free dark chocolate (check the label for milk ingredients) and coconut oil for melting. This way, you can enjoy a vegan-friendly treat!
Can I Add Extra Ingredients to the Filling?
Definitely! Feel free to mix in some chia seeds, chopped nuts, or even a sprinkle of cinnamon to your peanut butter mixture for added texture and flavor. Just ensure that any additions don’t make the filling too wet.