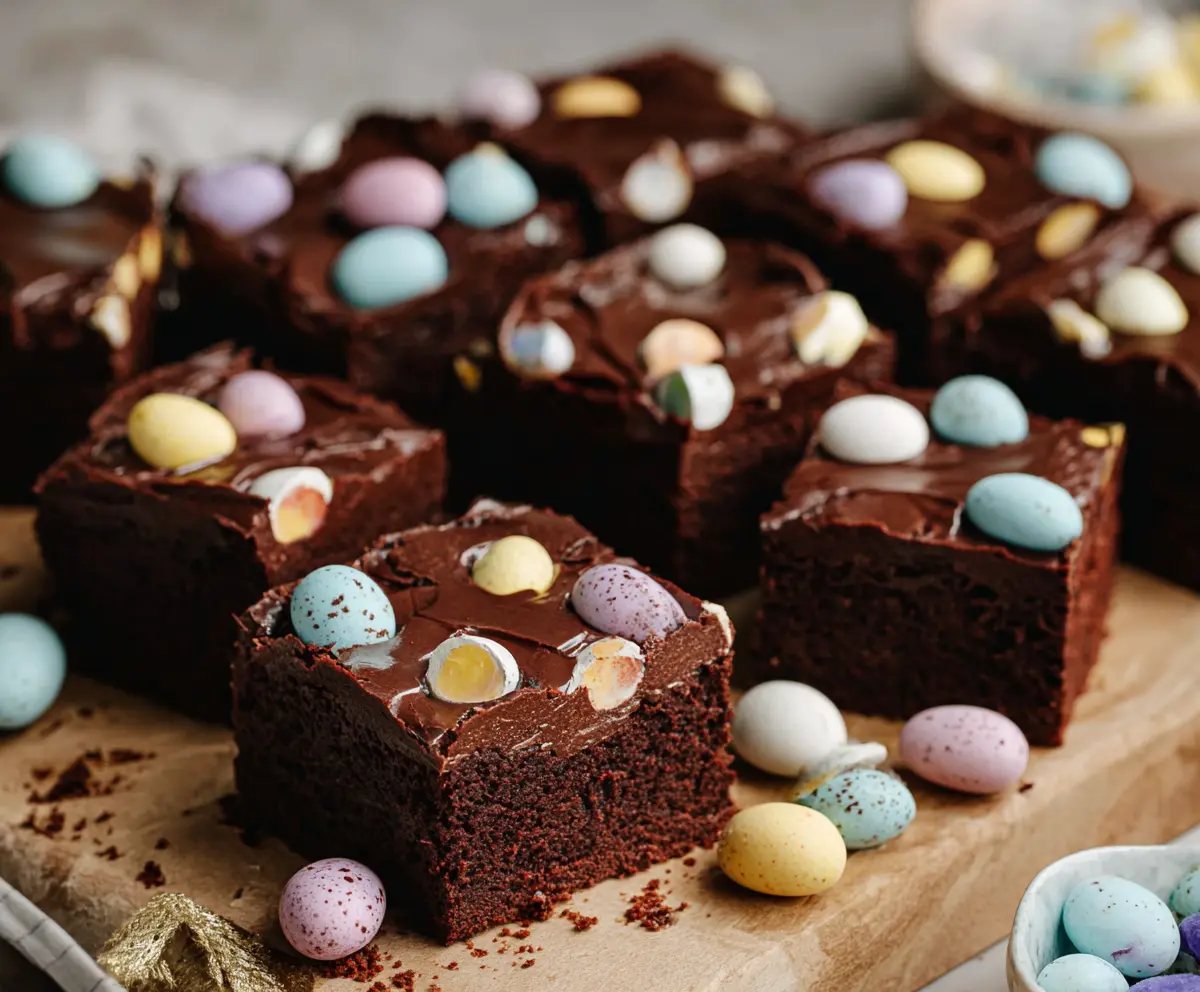
These Frosted Mini Egg Easter Brownies are a fun twist on a classic treat! Rich and fudgy brownies are topped with creamy frosting and colorful mini chocolate eggs. Yum!
They’re perfect for sharing or hoarding all to yourself (no judgment here!). I love how the crunchy eggs add a fun pop of color and flavor on top. 🌈
Making these brownies is so easy! I just whip up the batter, bake, frost, and sprinkle on those cute mini eggs. It’s a sweet way to celebrate! 🎉
Key Ingredients & Substitutions
Unsalted Butter: Butter is key for moist brownies. I recommend unsalted to control the saltiness. If you’re in a pinch, you can use margarine or coconut oil, but the flavor may change a bit.
Granulated Sugar: This gives the brownies sweetness. You could replace half with brown sugar for a richer flavor or use coconut sugar as a healthier alternative.
Eggs: Eggs add richness and structure. If you’re vegan, use flax eggs (1 tablespoon ground flaxseed mixed with 3 tablespoons water per egg) or applesauce (1/4 cup per egg) instead.
Cocoa Powder: Unsweetened cocoa is a must for that chocolate flavor. If you don’t have it, look for Dutch-process cocoa, which is milder and less acidic.
Mini Chocolate Eggs: These are the star! Use any chocolate candies you like, such as M&Ms or chopped chocolate bars if mini eggs aren’t available.
How Do You Achieve the Perfect Brownie Texture?
Getting the right brownie texture takes care, but it’s not hard! The goal is to mix just enough without overdoing it.
- Start by melting the butter and mixing with sugar until smooth. This creates that lovely fudgy texture.
- Add eggs one by one, really mixing them in well. This builds structure!
- When adding dry ingredients, fold gently with a spatula. Over-mixing can lead to dense brownies.
- Check for doneness at 25 minutes! A few moist crumbs on a toothpick means they’re perfect.
Frosted Mini Egg Easter Brownies
Ingredients You’ll Need:
For the Brownies:
- 1 cup (2 sticks) unsalted butter
- 2 cups granulated sugar
- 4 large eggs
- 1 tsp vanilla extract
- 1 cup all-purpose flour
- 1 cup unsweetened cocoa powder
- 1/2 tsp salt
- 1/2 tsp baking powder
- 1 1/2 cups mini chocolate eggs, chopped roughly (reserve some whole for topping)
- 1 cup semi-sweet chocolate chips (optional, for extra fudginess)
For the Frosting:
- 1/2 cup (1 stick) unsalted butter, softened
- 1 1/2 cups powdered sugar, sifted
- 1/4 cup unsweetened cocoa powder
- 2-3 tbsp milk or heavy cream
- 1/2 tsp vanilla extract
- Pinch of salt
How Much Time Will You Need?
This recipe takes about 15 minutes of prep time and 25-30 minutes of baking time. After baking, you’ll need some additional time for cooling before frosting, plus chilling time of at least 30 minutes to set. In total, you’re looking at about 1.5 hours before you can enjoy these delicious brownies!
Step-by-Step Instructions:
1. Preheat and Prepare:
Start by heating your oven to 350°F (175°C). Line a 9×13 inch baking pan with parchment paper, leaving some overhang on the sides to help you lift the brownies out later. Lightly grease the paper so the brownies won’t stick.
2. Melt the Butter:
In a medium saucepan, melt the butter over low heat. Once it’s melted, take it off the heat and stir in the granulated sugar until everything is well combined.
3. Add the Eggs:
Beat in the eggs one at a time, mixing well after each addition. Then stir in the vanilla extract for that delightful flavor.
4. Mix the Dry Ingredients:
In a separate bowl, whisk together the flour, cocoa powder, salt, and baking powder until they are evenly blended. This will ensure your brownies rise correctly and have a great texture.
5. Combine Wet and Dry Ingredients:
Gently fold the dry ingredients into the butter and egg mixture. Be careful not to overmix; just combine until you see no more flour streaks.
6. Add the Chocolate:
Now, fold in the roughly chopped mini chocolate eggs and chocolate chips if you’re using them. This makes the brownies extra special and chocolaty!
7. Bake the Brownies:
Pour the brownie batter into the prepared baking pan and smooth the top with a spatula. Bake for 25-30 minutes. To check for doneness, insert a toothpick in the center; it should come out with a few moist crumbs but shouldn’t be wet.
8. Cool the Brownies:
Remove the brownies from the oven and let them cool completely in the pan on a wire rack. Patience is key here; you want them fully cool before frosting!
9. Make the Frosting:
While the brownies cool, prepare the frosting. In a mixing bowl, beat the softened butter until it’s creamy. Then sift in the powdered sugar and cocoa powder, along with the vanilla extract and a pinch of salt.
10. Adjust the Consistency:
Gradually add milk or cream, one tablespoon at a time, mixing until you achieve a smooth, spreadable consistency. You’re aiming for that perfect frosting texture!
11. Frost the Brownies:
Once the brownies are fully cooled, spread the frosting evenly over the top, making it as smooth or swirly as you like!
12. Add the Finishing Touch:
For a festive look, garnish the frosting with reserved whole mini chocolate eggs, pressing them gently into the frosting.
13. Chill and Cut:
Place the frosted brownies in the refrigerator for at least 30 minutes to allow the frosting to set. When you’re ready, use the parchment overhang to lift the brownies out of the pan and cut them into squares.
Enjoy your festive, rich, and chocolaty Frosted Mini Egg Easter Brownies! They’re perfect for sharing at gatherings or for a sweet treat just for you!
Can I Use Different Types of Chocolate Eggs?
Absolutely! If mini chocolate eggs aren’t available, you can substitute with any chocolate candies like M&Ms or chopped chocolate bars. Just make sure they’re roughly the same size for even distribution in the brownies.
What If I Don’t Have Cocoa Powder?
If you’re out of cocoa powder, you can use Dutch-process cocoa for a similar taste, or try carob powder for a different flavor. Keep in mind that using carob will alter the taste slightly.
How Should I Store Leftover Brownies?
To keep your brownies fresh, store them in an airtight container at room temperature for up to 3 days. You can also refrigerate them for a longer shelf life, but make sure to let them come to room temperature before serving for the best texture.
Can I Make the Brownies Gluten-Free?
Yes! Simply replace the all-purpose flour with a gluten-free flour blend. Look for one that has a good structure, and make sure it contains xanthan gum or add a little to help bind the brownies.