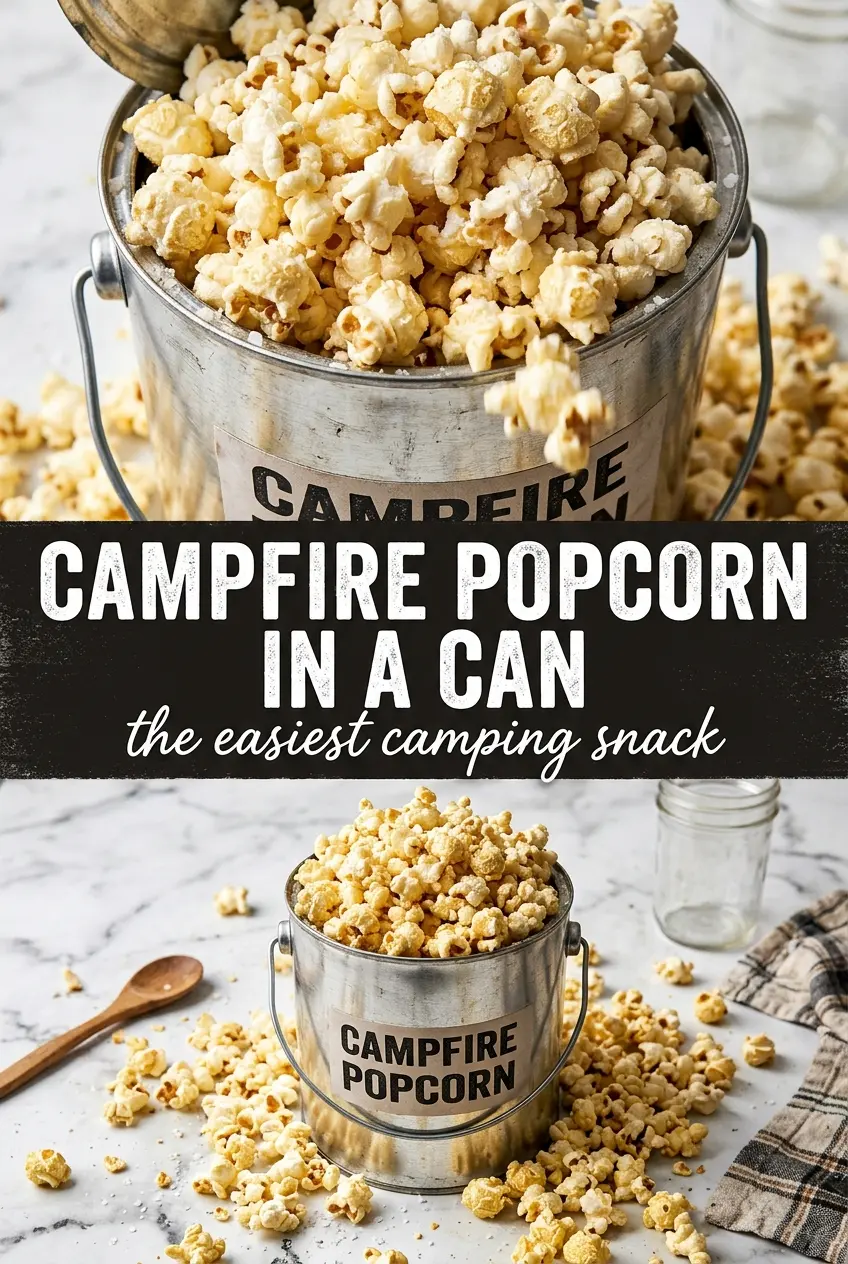
Campfire popcorn in a can turns a simple handful of kernels into a snack that feels a little magical the second the popping starts. The kernels spin, rattle, and then suddenly burst into a bowl of crisp, smoky popcorn with just enough char from the fire to make it taste different from anything you make indoors. It’s the kind of recipe people remember because it’s part snack, part campfire entertainment.
What makes this version work is the metal coffee can and the constant shaking. The can gives the kernels enough room to move around while keeping them close to the heat, and the small holes at the bottom let steam escape so the popcorn stays snappy instead of soggy. A little oil coats the kernels evenly, which helps them heat at the same pace and pop more consistently.
Below, I’ve included the small details that keep the can from scorching, plus a few ways to season it once it’s in the bowl. If you’ve ever had half-popped kernels or popcorn that tasted more burnt than toasted, the process notes here will help you avoid that.
The can popped the kernels evenly and almost every one opened up. I was nervous about shaking it over the fire, but the popcorn came out crisp, not burnt, and my kids loved watching it pop.
Save this campfire popcorn in a can for the nights when you want a hands-on camping snack with crisp kernels and that fresh-from-the-fire crunch.
The Part That Keeps the Kernels Popping Instead of Scorching
The biggest mistake with campfire popcorn is holding the can too close to the flame for too long. That gives you a few popped kernels and a lot of scorched oil smell. The better approach is steady, moderate heat and constant movement so the kernels heat evenly from all sides.
The holes in the bottom matter more than they look like they should. They let steam escape as the corn pops, which keeps the finished popcorn light instead of damp. If you skip the ventilation or leave the lid loose enough for kernels to escape, you’ll end up with a mess around the fire ring and a lot more unpopped kernels than you want.
- Metal coffee can — This is the best vessel because it holds heat well and stands up to open flame. A flimsy container warps fast, and anything with plastic parts is a nonstarter.
- Vegetable oil — Neutral oil works here because it doesn’t compete with the campfire flavor. Use enough to coat the kernels, not pool around them.
- Popcorn kernels — Fresh kernels pop better than old ones that have dried out in the pantry. If your popcorn is leaving lots of duds behind, age is usually the reason.
- Melted butter — This belongs on the finished popcorn, not in the can. Butter can burn before the kernels are done, and that’s the fastest way to ruin the batch.
Getting the Fire Heat Right From the First Shake
Vent the Can and Load It Evenly
Punch several small holes in the bottom of the coffee can before you head outside, then add the kernels and oil and secure the lid. The holes should be small enough that kernels don’t fall through but open enough to release steam. If the lid doesn’t sit snugly, popping kernels can jump right out, so check the fit before the can ever touches the fire.
Keep the Can Moving Over the Flames
Hold the can over the campfire and shake constantly for 8 to 10 minutes. The sound should move from quiet sizzling to a fast pop-pop-pop, then gradually slow down near the end. If you pause too long in one spot, the bottom can scorch before the rest of the kernels finish popping.
Stop When the Popping Slows Down
As soon as the popping stretches to a few seconds between pops, pull the can off the heat. Waiting for every last kernel means overcooking the batch, and the popcorn at the bottom starts to taste burnt before the top layer is done. Let the can sit for a moment, then open it away from your face and pour the popcorn into a bowl right away.
Dairy-Free Butter Finish
Skip the melted butter and finish with extra salt or a drizzle of olive oil instead. You lose the classic buttery coating, but you keep the popcorn light and crisp, which is the part that matters most here.
Cheesy Campfire Popcorn
Toss the hot popcorn with a little grated Parmesan and black pepper after it comes out of the can. The cheese clings best while the popcorn is still warm, and you get a savory finish without changing the popping method.
Sweet and Salty Version
Add a light dusting of cinnamon sugar after buttering the popcorn, then toss quickly so it coats evenly. Don’t add the sugar to the can, or it can scorch before the kernels finish popping.
Storage and Reheating
- Refrigerator: Not recommended. Popcorn turns soft in the fridge and loses the crisp texture that makes it worth eating.
- Freezer: Not a good freezer snack. The moisture changes from freezing and thawing will make the popcorn chewy.
- Reheating: If the popcorn softens, spread it on a dry baking sheet and warm it in a 250°F oven for a few minutes. Don’t cover it, or the trapped steam will make it limp again.
Answers to the Questions Worth Asking
Campfire Popcorn in a Can
Ingredients
Equipment
Method
- Punch several small holes in the bottom of the can for ventilation, leaving the lid intact so steam can escape safely.
- Add popcorn kernels and vegetable oil to the can, then secure the lid tightly to contain the popping action.
- Create a handle by wrapping wire around the can so you can hold it steady over the fire without burning your hands.
- Hold the can over the campfire flames and shake constantly for 8-10 minutes, until popping slows to an occasional pop.
- Carefully remove the lid and pour the popcorn into a bowl right away so it stays crisp.
- Season with salt to taste, and drizzle with melted butter if desired, so the coating clings while the popcorn is hot.