Deeply golden braised chicken lands on the table with skin that stays crisp at the edges and meat that pulls cleanly from the bone. The broth reduces into a glossy pan sauce that tastes like onion, wine, thyme, and the sweet, slow richness of carrots cooked down in the same pot. It’s the kind of dish that feels calm and deliberate, but the payoff is bigger than the work.
What makes this version worth keeping is the balance in the pot. The chicken is seared hard enough to build flavor, then the braising liquid is kept just at a gentle simmer in the oven so the thighs turn tender instead of stringy. Tomato paste adds backbone without making the sauce taste tomato-heavy, and the butter stirred in at the end gives the broth a rounded finish that clings to the chicken.
Below you’ll find the small details that matter most: how dark the skin should get before it goes into the oven, why the wine goes in before the broth, and what to do if you want the sauce a little thicker. Once you’ve made it once, the whole method starts to feel like second nature.
The skin browned beautifully in the Dutch oven and the sauce reduced into something rich enough to spoon over potatoes. My husband kept saying the chicken tasted like it had been cooking all day.
Save this braised chicken for the nights when you want deeply browned thighs, a glossy pan sauce, and one pot doing all the heavy lifting.
The Difference Between Tender Chicken and Dry Chicken Starts in the Oven
Braised chicken only turns silky when the oven runs low enough to keep the liquid barely moving. If the heat is too high, the broth boils hard, the skin softens too fast, and the meat tightens before it has time to relax. A 325°F oven gives the thighs enough heat to finish cooking gently while the braising liquid does the real work.
The other trap is rushing the sear. You want the skin dark gold, not pale and patchy, because that first layer of browning becomes the backbone of the sauce later. If the chicken sticks at first, leave it alone for another minute; once it’s properly seared, it releases on its own.
- Bone-in, skin-on thighs — These stay juicy through the braise and give the liquid enough fat and flavor to taste full instead of thin. Boneless thighs can work in a pinch, but they cook faster and won’t give you the same rich sauce.
- Tomato paste — It deepens the broth without making it taste like tomato sauce. Let it cook in the pan for a full minute or two so it loses that raw edge and takes on a brick-red color.
- Dry white wine — This lifts the browned bits off the bottom and adds acidity that keeps the finished sauce from tasting flat. Use something dry and drinkable; sweet wine will throw the balance off.
- Fresh thyme and rosemary — Fresh herbs matter here because they hold up during the long braise and perfume the broth without turning dusty. Dried herbs can work, but use less and expect a slightly flatter finish.
What Each Ingredient Is Actually Doing in This Recipe

- Primary ingredient (the star) — Quality matters most. Choose the best you can find.
- Cooking medium (oil, butter, or broth) — This carries flavors and prevents dryness.
- Seasonings (salt, pepper, spices, herbs) — Layer flavors so nothing overpowers. Build depth gradually.
- Aromatics (garlic, onion, herbs) — Cook with fat to bloom flavors. Become the foundation.
- Supporting ingredients — Complement the main ingredient without overpowering it.
- Sauce or liquid (if applicable) — Brings flavors together. Balance richness with acid.
- Acid (lemon, vinegar, wine, or other) — Brightens and prevents flat-tasting results.
- Final finish (garnish, glaze, or sauce) — Prevents one-dimensional taste and adds visual appeal.
What Happens in the Pan Before the Chicken Goes Back In
Building the Sear
Season the thighs generously, then lay them skin-side down in hot olive oil and leave them alone until the skin turns deeply golden and releases cleanly from the pan. That usually takes 6 to 7 minutes, and the color should be closer to hazelnut than pale gold. If the heat is too low, the chicken will steam in its own fat instead of browning. Remove it once the first side is done; the chicken finishes later in the oven.
Sweetening the Onions and Carrots
Cook the diced onion and sliced carrots in the rendered fat until the onion softens at the edges and the carrots pick up a little color. This stage matters because the vegetables become part of the sauce, not a separate side note. Stir in the garlic and tomato paste and cook until the paste darkens slightly and smells sweet, not sharp. If the garlic starts to brown hard, the heat is too high and the broth will carry that bitterness through the whole dish.
Deglazing and Braising
Pour in the white wine and scrape up every browned bit from the bottom of the Dutch oven. Let it simmer for about 2 minutes so the alcohol cooks off and the liquid stops smelling harsh. Add the broth, herbs, and bay leaf, nestle the chicken back in skin-side up, then cover and move the pot to the oven. The liquid should come partway up the chicken, not fully cover it; too much broth will wash out the sear you worked for.
Finishing the Sauce
When the thighs are tender, pull out the bay leaf and herb stems, then swirl in the butter off the heat. That last bit smooths the broth and gives it a glossy finish without making it greasy. If you want the sauce thicker, simmer it on the stove for a few minutes after removing the chicken. Don’t boil it hard at the end or the fat will separate and the texture will turn muddy.
Three Ways to Make This Braised Chicken Fit Your Table
Make it dairy-free
Leave out the butter at the end and finish the sauce with a teaspoon of olive oil instead. You’ll lose a little silkiness, but the broth will still taste full because the browned chicken and vegetables carry the flavor.
Skip the wine
Use an extra 1/2 cup of chicken broth plus 1 teaspoon of white wine vinegar or lemon juice. You still need that bright edge to cut through the richness, or the sauce can taste heavy and one-note.
Add more vegetables for a one-pot meal
Stir in mushrooms or halved baby potatoes with the broth so they braise alongside the chicken. Mushrooms deepen the sauce, while potatoes turn the dish into a complete dinner without changing the method.
Use boneless thighs
Boneless thighs cook faster and stay tender, but they won’t give you quite the same depth in the sauce. Start checking them about 10 minutes early so they don’t overcook and lose their juiciness.
Storage and Reheating
- Refrigerator: Store covered for up to 4 days. The chicken stays moist, and the sauce usually tastes even better the next day.
- Freezer: Freezes well for up to 3 months. Let it cool completely, then pack chicken and sauce together in a freezer-safe container so the meat doesn’t dry out.
- Reheating: Warm it gently on the stovetop over low heat with a splash of broth if needed. The common mistake is blasting it in the microwave or over high heat, which tightens the chicken and can make the sauce separate.
Questions I Get Asked About This Recipe
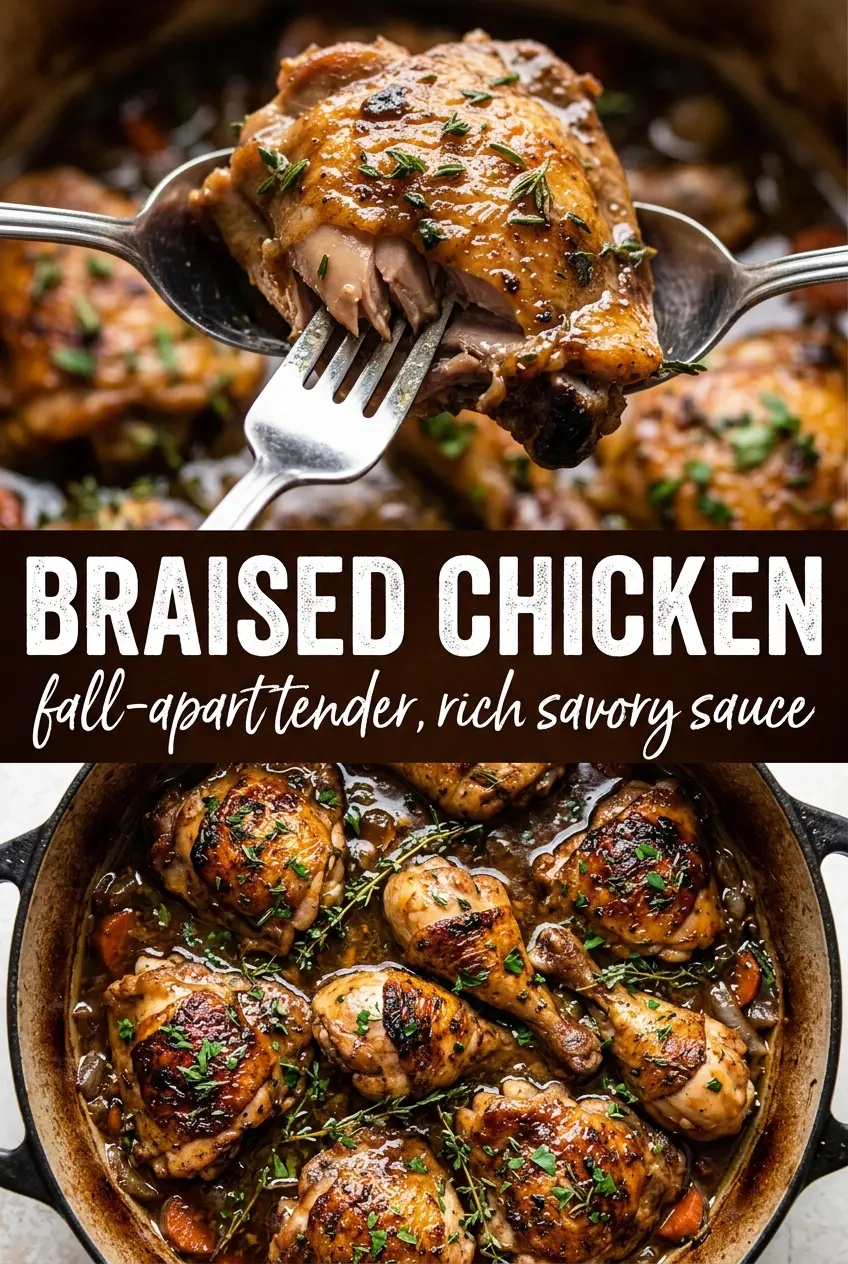
Braised Chicken
Ingredients
Equipment
Method
- Preheat oven to 325F. Season chicken generously with salt and pepper.
- Heat olive oil in a Dutch oven over medium-high heat until shimmering. Sear chicken skin-side down 6-7 minutes until deeply golden, then remove.
- Add onion and carrots to the Dutch oven and sauté 4 minutes. Add garlic and tomato paste and cook 2 minutes.
- Pour in white wine to deglaze, scraping up browned bits from the pan. Simmer 2 minutes.
- Add chicken broth, thyme, rosemary, and bay leaf. Return chicken skin-side up.
- Cover the Dutch oven and braise in the oven 35-40 minutes until very tender. Keep it covered the entire time for steady moisture.
- Swirl in butter and remove bay leaf and herbs. Garnish with fresh parsley to serve.


