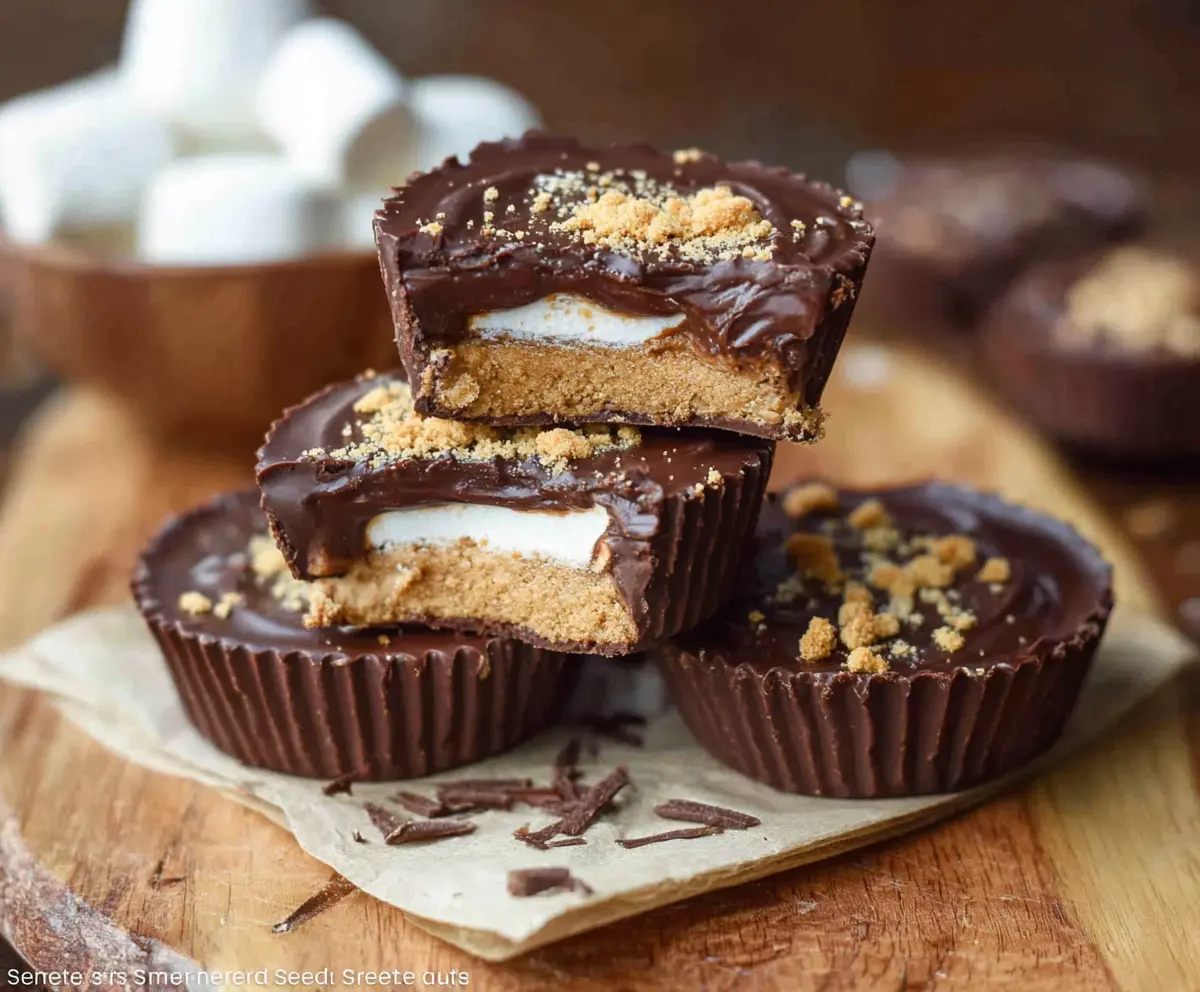
If you love the classic campfire treat, you’ll enjoy these S’mores Peanut Butter Cups! They’re made with creamy peanut butter, chocolate, and crunchy graham crackers. Yum!
These treats remind me of summer nights by the fire but without the mess! I can’t resist sneaking a few, especially when they’re fresh out of the fridge. Who can blame me? 😄
Making these cups is super easy! Just layer the tasty ingredients in a muffin tin and let them chill. Perfect for a quick sweet fix or to share with friends!
Key Ingredients & Substitutions
Peanut Butter: Creamy peanut butter gives these cups their rich flavor. If you’re looking for a healthier option, try natural peanut butter. Almond butter also works well for those with allergies.
Chocolate: Semi-sweet chocolate chips are perfect for sweetness and melting. If you prefer a darker chocolate, go for bittersweet. For a fun twist, use milk chocolate for a sweeter treat.
Marshmallows: Large marshmallows add that classic s’mores feel, but mini marshmallows are easier to fit into the cups. If you’re avoiding marshmallows altogether, consider using a marshmallow-flavored frosting as a substitute.
Graham Crackers: These crushed crackers add crunch and flavor. If gluten-free, use gluten-free graham crackers or crushed nuts instead for a different texture.
How Do I Melt Chocolate Without Burning It?
Melted chocolate is essential for coating these cups, but it can burn easily. Here’s how to safely melt it:
- Use a microwave-safe bowl, ideally glass or ceramic.
- Heat chocolate in 30-second bursts at 50% power, stirring in between each interval.
- Stop once it’s mostly melted and give it a good stir. The residual heat will finish melting it.
This gentle method will give you smooth, silky chocolate every time!
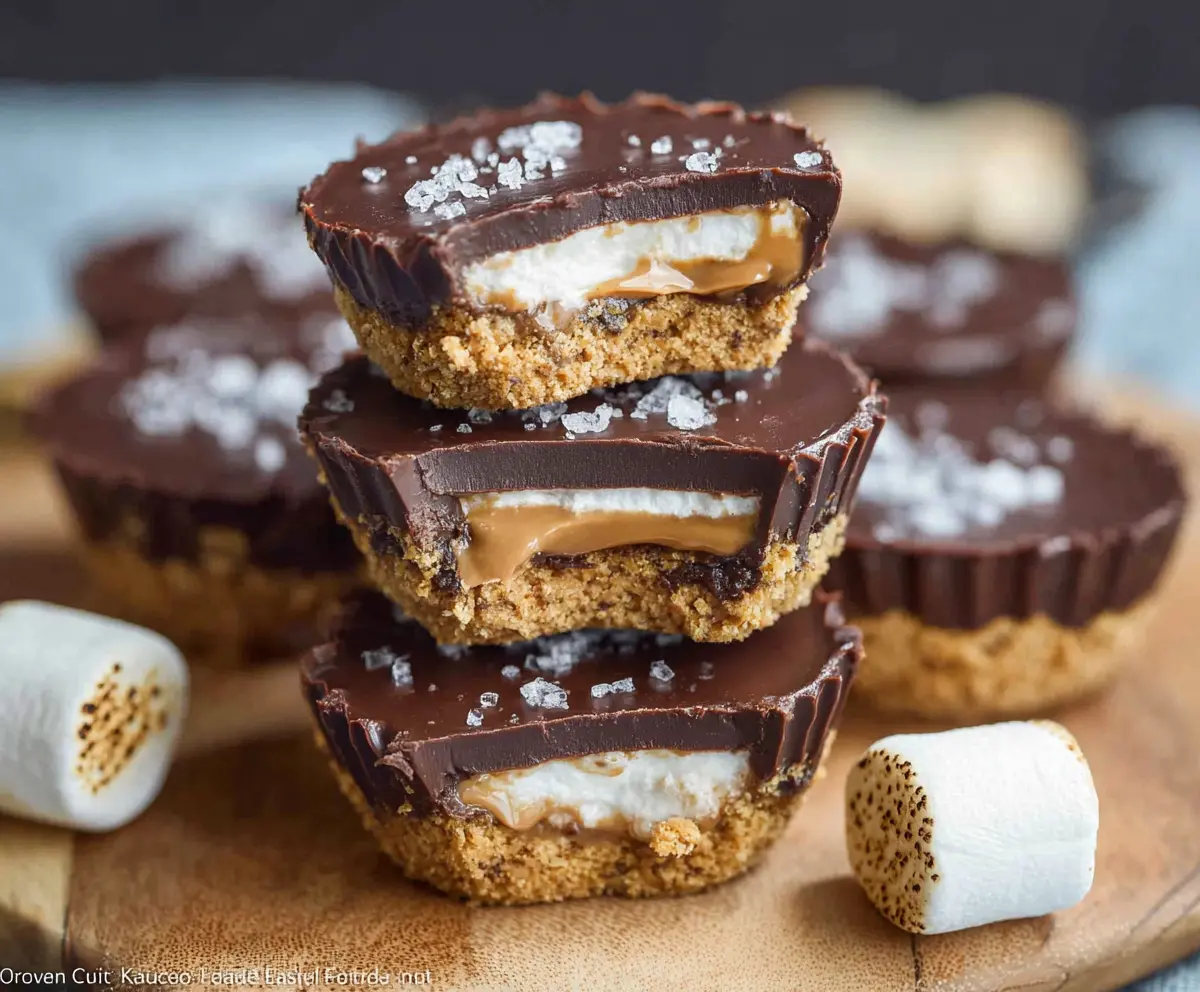
What’s the Best Way to Layer the Ingredients?
Layering gives these cups their structure. Here’s how:
- Start with the peanut butter mixture at the bottom—press it firmly for a good base.
- Add marshmallows right on top, leaving a bit of space for chocolate.
- Pour melted chocolate carefully to cover the marshmallows completely, ensuring they’re sealed in.
This method ensures your cups hold together well and every bite has all the flavors!
How to Make S’mores Peanut Butter Cups
Ingredients You’ll Need:
Main Ingredients:
- 1 cup creamy peanut butter (unsweetened or lightly salted)
- 1/4 cup unsalted butter, softened
- 1/4 cup powdered sugar
- 1 1/2 cups semi-sweet chocolate chips or chopped chocolate
- 12 large marshmallows (or mini marshmallows)
- 6 graham crackers, finely crushed (about 1 cup crumbs)
- Optional: extra graham cracker crumbs for sprinkling on top
How Much Time Will You Need?
This delightful treat takes about 15 minutes to prepare and then needs to chill in the refrigerator for at least 2 hours to set properly. So, a total of around 2 hours and 15 minutes before you can dig in!
Step-by-Step Instructions:
1. Prepare the Muffin Tin:
Start by lining a muffin tin with 12 paper liners. If you’re using a silicone muffin mold, just give it a light grease with cooking spray. This will help in removing the cups later.
2. Make the Peanut Butter Mixture:
In a mixing bowl, combine the creamy peanut butter, softened butter, and powdered sugar. Mix well with a spatula or spoon until it’s nice and smooth. This will be the delicious bottom layer of your cups.
3. Fill the Muffin Cups:
Spoon a small amount of the peanut butter mixture into each muffin cup, pressing down firmly to create an even bottom layer. Make sure they’re packed in well!
4. Add Marshmallows:
Place one large marshmallow or a few mini marshmallows on top of the peanut butter layer in each cup. Make sure they are centered and snugly fit!
5. Melt the Chocolate:
In a microwave-safe bowl, add the chocolate chips or chopped chocolate. Microwave them in 30-second intervals, stirring in between, until it’s smooth and melted. Be careful not to overheat!
6. Pour the Chocolate:
Spoon the melted chocolate over the marshmallows, ensuring they are completely covered and filling each cup almost to the rim. It’s okay if some chocolate spills over the sides—it adds to the fun!
7. Sprinkle the Graham Crackers:
While the chocolate is still melted, sprinkle some crushed graham crackers over the top of each cup for added crunch and flavor. If you like, sprinkle extra graham cracker crumbs for decoration.
8. Chill the Cups:
Place the muffin tin in the refrigerator and let the cups chill for at least 2 hours, or until they are fully set and firm to the touch.
9. Remove and Store:
Once set, carefully remove the peanut butter cups from the muffin tin. If you used liners, just peel them off! Store the cups in an airtight container in the refrigerator until you’re ready to enjoy them.
Now you’re ready to savor your homemade S’mores Peanut Butter Cups, a delightful treat that captures the classic campfire flavors in each scrumptious bite!
Can I Use Natural Peanut Butter Instead of Creamy?
Yes, natural peanut butter works fine! Just be aware that it may be a bit oilier, so you might need to adjust the powdered sugar to balance the consistency if it’s too runny.
How Do I Store These Peanut Butter Cups?
Keep your S’mores Peanut Butter Cups in an airtight container in the refrigerator. They should stay fresh for up to a week, but I doubt they’ll last that long!
Can I Make These Without Marshmallows?
Absolutely! If you prefer, you can use marshmallow fluff as a substitute or skip marshmallows entirely for a different twist. Just keep the layers of peanut butter and chocolate to maintain the flavor.
What’s the Best Way to Ensure They Set Properly?
Make sure to refrigerate the cups for at least 2 hours or until fully firm. If you’re in a hurry, placing them in the freezer for 30-60 minutes can speed up the process, but be careful not to freeze them completely!