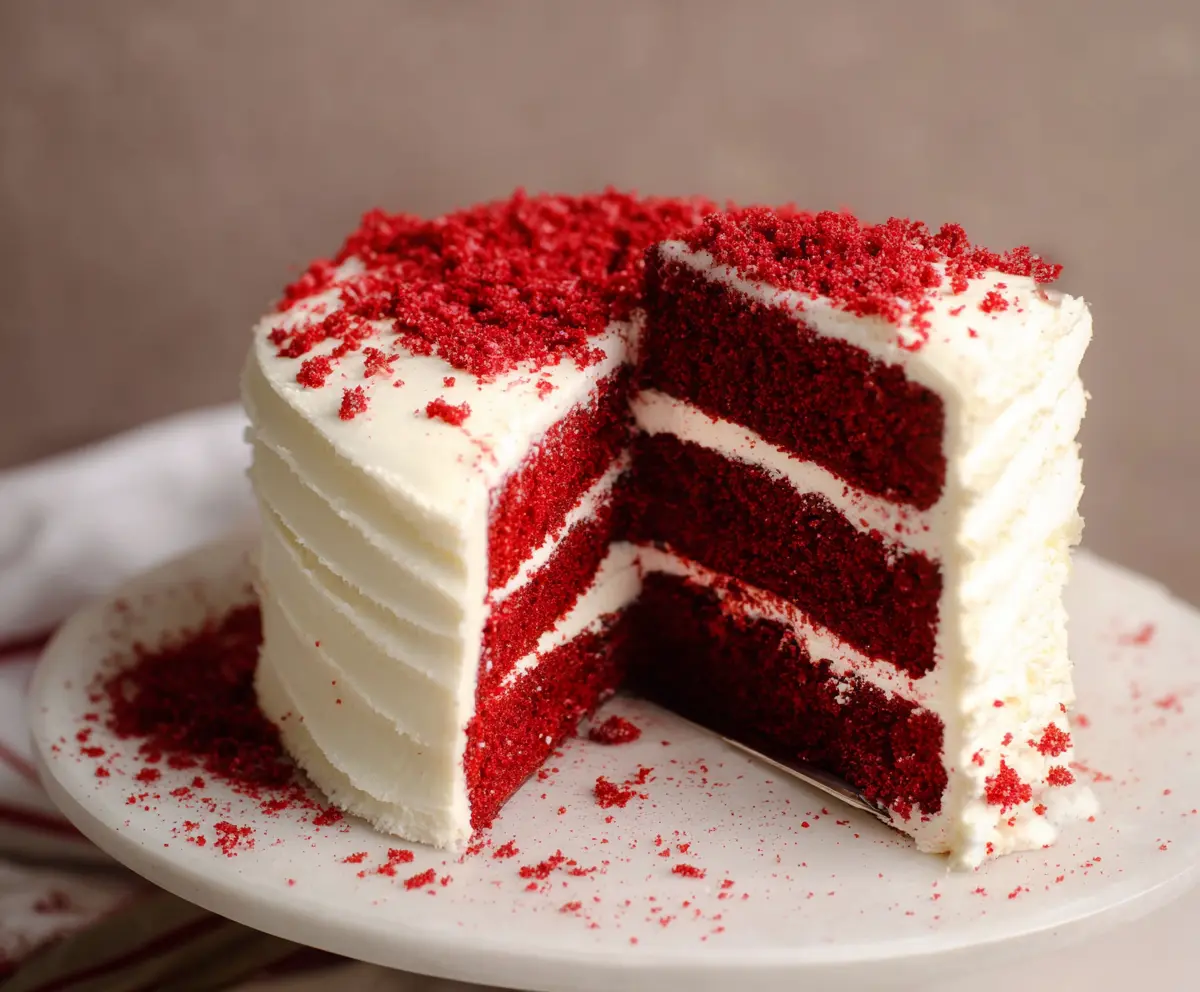
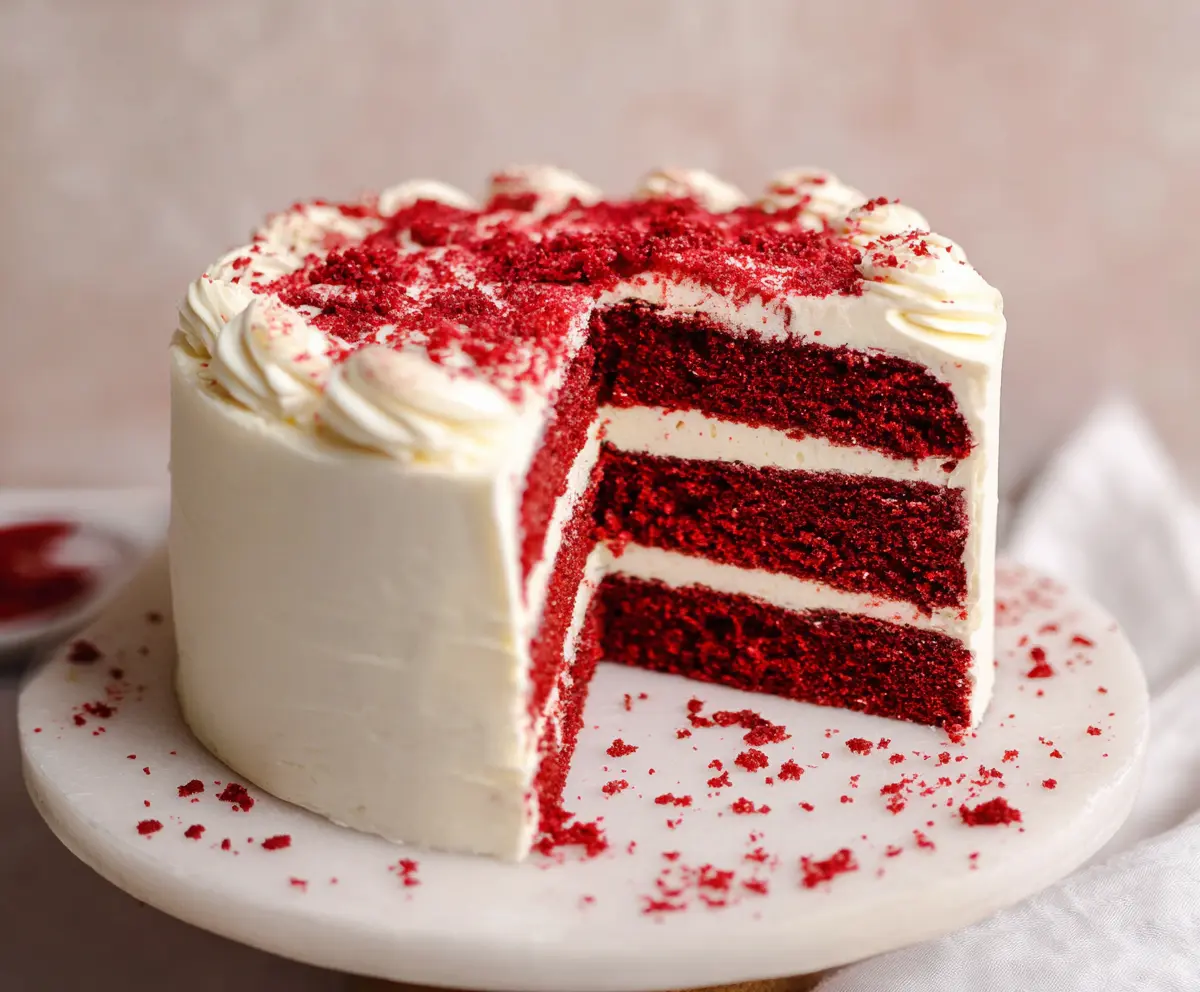
Red Velvet Cake is a stunning dessert that brings a touch of magic to any occasion. With its bright red color and soft, fluffy texture, it’s both eye-catching and delicious!
This cake is often paired with cream cheese frosting for that perfect sweet and tangy flavor combo. Honestly, who can resist a slice of that? I always take a second piece… just for balance! 😄
Baking this cake is a breeze! Just mix, layer, and frost – it’s as fun to make as it is to share with friends and family. Perfect for celebrations or just because it’s Tuesday!
Key Ingredients & Substitutions
All-Purpose Flour: This is the backbone of your cake. If you need a gluten-free option, you can use a 1:1 gluten-free flour blend.
Granulated Sugar: Regular sugar is a must for sweetness. For a less refined alternative, coconut sugar works well, but it may change the color a bit.
Vegetable Oil: I like using oil for moisture. If you prefer, you can substitute it with melted butter or even applesauce for a lighter option.
Buttermilk: This adds a tangy flavor. If you don’t have it, mix 1 cup of milk with 1 tbsp of vinegar or lemon juice and let it sit for 5-10 minutes.
Cream Cheese: The star of the frosting! If you’re looking for a lighter version, you can try Greek yogurt or ricotta cheese mixed with powdered sugar.
What’s the Best Way to Ensure My Cake Stays Moist?
A key to a moist red velvet cake is not overmixing your batter. After adding the dry ingredients, mix just enough for everything to come together. Also, avoid overbaking; check for doneness a few minutes early to keep that cake light and fluffy.
- Remember to let the cakes cool completely before frosting to prevent melting the cream cheese!
- Level the tops if they’re domed to help the layers stack flat, making it easier to frost.
- Chilling the cake after frosting helps the frosting set nicely.
Red Velvet Cake
Ingredients You’ll Need:
For the Cake:
- 2 1/2 cups (312g) all-purpose flour
- 1 1/2 cups (300g) granulated sugar
- 1 tsp baking soda
- 1 tsp fine salt
- 1 tsp cocoa powder (unsweetened)
- 1 1/2 cups (360ml) vegetable oil
- 1 cup (240ml) buttermilk, room temperature
- 2 large eggs, room temperature
- 2 tbsp (30ml) red food coloring
- 1 tsp white distilled vinegar
- 2 tsp vanilla extract
For the Cream Cheese Frosting:
- 16 oz (450g) cream cheese, softened
- 1/2 cup (115g) unsalted butter, softened
- 4 cups (480g) powdered sugar, sifted
- 1 tsp vanilla extract
- Pinch of salt
How Much Time Will You Need?
This delightful red velvet cake takes about 20 minutes for preparation and around 30 minutes to bake. Don’t forget to let it cool completely before frosting, which should take an additional hour in the refrigerator for the best results. So, overall, expect to spend about 2 hours from start to finish!
Step-by-Step Instructions:
1. Preheat and Prepare:
First, get your oven ready by preheating it to 350°F (175°C). Grease and flour three 8-inch round cake pans or line them with parchment paper to make cake removal easier later on.
2. Mix the Dry Ingredients:
In a medium bowl, sift together your flour, baking soda, salt, and cocoa powder. This ensures that everything is evenly combined and helps the cake rise beautifully. Set this bowl aside for later.
3. Combine Sugar and Oil:
Now, grab a large mixing bowl and whisk together the granulated sugar and vegetable oil until they are nicely combined.
4. Add the Eggs:
Add the eggs one at a time, mixing well after each addition to ensure a smooth batter.
5. Mix in the Flavor:
Now, stir in the red food coloring, vinegar, and vanilla extract. This will give your cake its vibrant color and amazing flavor! Mix until everything is blended together well.
6. Combine Wet and Dry Ingredients:
Next, alternately add the dry ingredients and the buttermilk to the red mixture. Start with some dry ingredients, then add some buttermilk, and repeat, ending with dry ingredients. Make sure to mix just until combined—don’t overmix!
7. Bake the Cakes:
Divide the batter evenly among your prepared cake pans and place them in the oven. Bake for 25 to 30 minutes, or until a toothpick inserted into the center comes out clean.
8. Cool the Cakes:
Once baked, remove the cakes from the oven and let them cool in the pans for about 10 minutes. After that, turn them out onto a wire rack to cool completely.
9. Prepare the Frosting:
While the cakes cool, it’s time to make the cream cheese frosting! In a mixing bowl, beat the softened cream cheese and butter together until smooth and creamy. Gradually add in the powdered sugar, mixing well after each addition.
10. Add Flavor to the Frosting:
Once your frosting is fluffy, mix in the vanilla extract and a pinch of salt. Beat until everything is well combined and smooth.
11. Assemble the Cake:
When the cakes are completely cool, check to see if they need leveling by slicing off any domed tops. Place the first cake layer on your serving plate and spread a generous layer of cream cheese frosting on top.
12. Add More Layers:
Repeat with the second cake layer and then add the third layer on top. Make sure to frost the top and sides of the entire cake with the remaining cream cheese frosting for a beautiful finish.
13. Optional Decoration:
If you like, take any trimmings from the cake and crumble them over the top for a festive touch.
14. Chill Before Serving:
Finally, refrigerate the cake for at least 1 hour before serving to help the frosting set properly. This makes it easier to slice and serve.
Now you’re all set to enjoy a luscious, moist red velvet cake with delightful cream cheese frosting. Share it with friends or keep it all for yourself—no judgment here!
Can I Use Gel Food Coloring Instead of Liquid?
Absolutely! Gel food coloring is a great alternative and often more concentrated, so you might need less. Start with 1 tablespoon and adjust to achieve your desired red hue.
How Should I Store Leftovers?
Store any leftover cake in an airtight container in the refrigerator. It will stay fresh for up to 3 days. If freezing, wrap slices tightly in plastic wrap and place in a freezer-safe container for up to 2 months. Thaw in the fridge overnight before enjoying!
Can I Make This Recipe Dairy-Free?
Yes! Substitute buttermilk with a dairy-free option like almond milk mixed with 1 tablespoon of vinegar or lemon juice. For the cream cheese frosting, use a dairy-free cream cheese alternative to keep it dairy-free.
What if My Cake Layers Are Domed?
No worries! If your cake layers rise and domed while baking, simply trim the tops with a serrated knife to make them flat before stacking. This will help the layers sit evenly on top of each other for a more professional-looking cake!