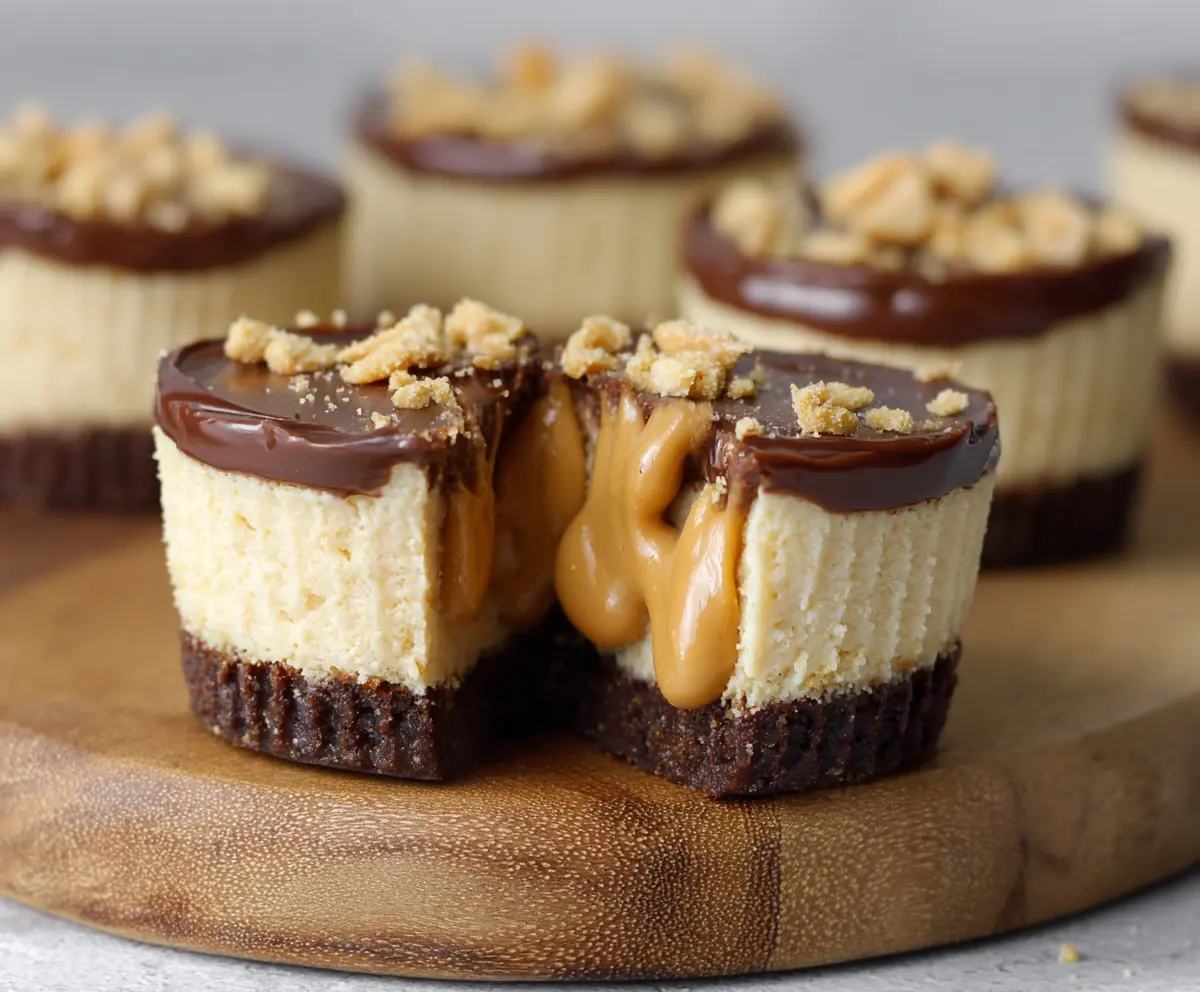
These Peanut Butter Cheesecake Bites are a little taste of heaven! They have a creamy peanut butter center and a crumbly chocolate crust that will make your taste buds dance with joy.
Get ready for a treat that’s both cute and delicious! They’re perfect for sharing or enjoying all by yourself. Let’s be honest, I usually end up keeping a few for later… maybe more than a few! 😋
Key Ingredients & Substitutions
Chocolate Cookie Crumbs: I recommend using Oreo crumbs for a classic taste. If you’re looking for a gluten-free option, use gluten-free chocolate cookies or even graham crackers for a different flavor.
Cream Cheese: Full-fat cream cheese gives a creamy texture. If you want a lighter version, low-fat cream cheese works too, but the bites may be a bit less rich.
Peanut Butter: Creamy peanut butter is best for a smooth layer. For those with nut allergies, sunbutter or tahini can be great alternatives. Just remember that tastes may vary!
Chocolate Chips: Semi-sweet chocolate chips balance well with the sweetness of the bites. Dark chocolate can be used for a richer taste, or milk chocolate for more sweetness.
What’s the Best Way to Prepare the Crust?
The crust is key for that crunchy texture. Here’s how to get it right:
- Mix the cookie crumbs and melted butter until combined. It should look like wet sand.
- Press firmly into the bottom of each muffin cup so it holds together. You can use a glass to help pack it down.
- Chilling it before adding filling ensures the crust stays stable when you stack flavors!
How Can You Ensure the Cheesecake Layer is Perfectly Smooth?
For a creamy cheesecake layer, follow these tips:
- Make sure the cream cheese is at room temperature. Cold cream cheese will turn lumpy.
- Beat the cream cheese, sugar, and vanilla extract until fully combined. Use a hand mixer or stand mixer for best results!
- Don’t over-mix, as too much air can cause the cheesecake to crack during setting.
These Peanut Butter Cheesecake Bites are an easy and delightful treat. Enjoy the texture and layers, and remember that the key is patience in chilling between layers for the best outcome!
Peanut Butter Cheesecake Bites
Ingredients You’ll Need:
For the Crust:
- 1 cup chocolate cookie crumbs (e.g., Oreo crumbs without filling)
- 4 tablespoons unsalted butter, melted
For the Cheesecake Layer:
- 8 ounces cream cheese, softened
- 1/4 cup granulated sugar
- 1 teaspoon vanilla extract
For the Peanut Butter Layer:
- 1/2 cup creamy peanut butter
- 1/4 cup powdered sugar
For the Chocolate Topping:
- 1 cup semi-sweet chocolate chips
- 1 tablespoon coconut oil or butter
For Garnish:
- Crushed peanut butter or peanut brittle pieces (optional)
How Much Time Will You Need?
You’ll need about 30 minutes to prepare these bites, plus at least 1 hour to chill in the refrigerator. That makes it a total of around 1 hour and 30 minutes from start to finish. Perfect for a quick and satisfying dessert!
Step-by-Step Instructions:
1. Prepare Your Muffin Tin:
Start by lining a mini muffin tin with paper liners or use silicone muffin cups for easy removal later. This ensures each bite comes out perfectly shaped!
2. Make the Crust:
In a small bowl, mix the chocolate cookie crumbs with the melted butter until they are well combined. The mixture should look like wet sand. Press about 1 tablespoon of this mixture into the bottom of each muffin cup to form a solid crust layer. Place the muffin tin in the refrigerator while you prepare the next layer.
3. Prepare the Cheesecake Layer:
In a medium bowl, using a hand mixer, beat the softened cream cheese with the sugar and vanilla extract until it’s smooth and creamy. Ensure there are no lumps. Spoon or pipe this cheesecake mixture evenly over the crust in each cup, smoothing the tops gently with a spatula.
4. Chill the Cheesecake Layer:
Place the muffin tin back in the fridge for about 20 minutes to let the cheesecake layer set slightly.
5. Mix the Peanut Butter Layer:
In a small bowl, combine the creamy peanut butter and powdered sugar. Mix until smooth and well blended. Spread or pipe this peanut butter mixture evenly over the chilled cheesecake layer in each cup. It should create a nice, thick layer over the cheesecake.
6. Chill Again:
Chill the muffin tin for another 10 minutes to firm up the peanut butter layer.
7. Melt the Chocolate Topping:
In a microwave-safe bowl, melt the chocolate chips with the coconut oil or butter. Heat in 20-second intervals, stirring in between, until the mixture is completely smooth.
8. Add the Chocolate Topping:
Once melted, pour or spoon the chocolate over the peanut butter layer, tapping the pan gently to smooth out the surface and eliminate any air bubbles.
9. Add a Touch of Garnish:
If you’d like, sprinkle some crushed peanut butter pieces or peanut brittle on top of the chocolate for extra flavor and crunch.
10. Final Chill:
Refrigerate the assembled bites for at least 1 hour, or until they are set and firm to the touch.
11. Serve and Enjoy:
Once the bites are fully set, carefully remove them from the muffin cups. Serve chilled and enjoy your delightful, rich Peanut Butter Cheesecake Bites!
These treats are sure to be a hit, packed with layers of chocolate, cheesecake, and peanut butter goodness!
Can I Use a Different Type of Nut Butter?
Absolutely! You can substitute creamy peanut butter with almond butter, cashew butter, or even sunflower seed butter for a nut-free option. Just keep in mind that the flavor will vary slightly with each nut butter.
How Can I Make These Cheesecake Bites Gluten-Free?
To make gluten-free Peanut Butter Cheesecake Bites, simply use gluten-free chocolate cookie crumbs for the crust. Many brands offer gluten-free Oreo cookies or you can use crushed gluten-free graham crackers.
How Long Can I Store Leftovers?
You can store any leftovers in an airtight container in the refrigerator for up to 4-5 days. Just make sure to consume them chilled for the best taste and texture!
Can I Freeze These Cheesecake Bites?
Yes, these bites freeze well! Place them in a single layer in an airtight container or freezer-safe bag. They can be frozen for up to 2 months. Thaw them in the refrigerator before serving for the best flavor and texture.