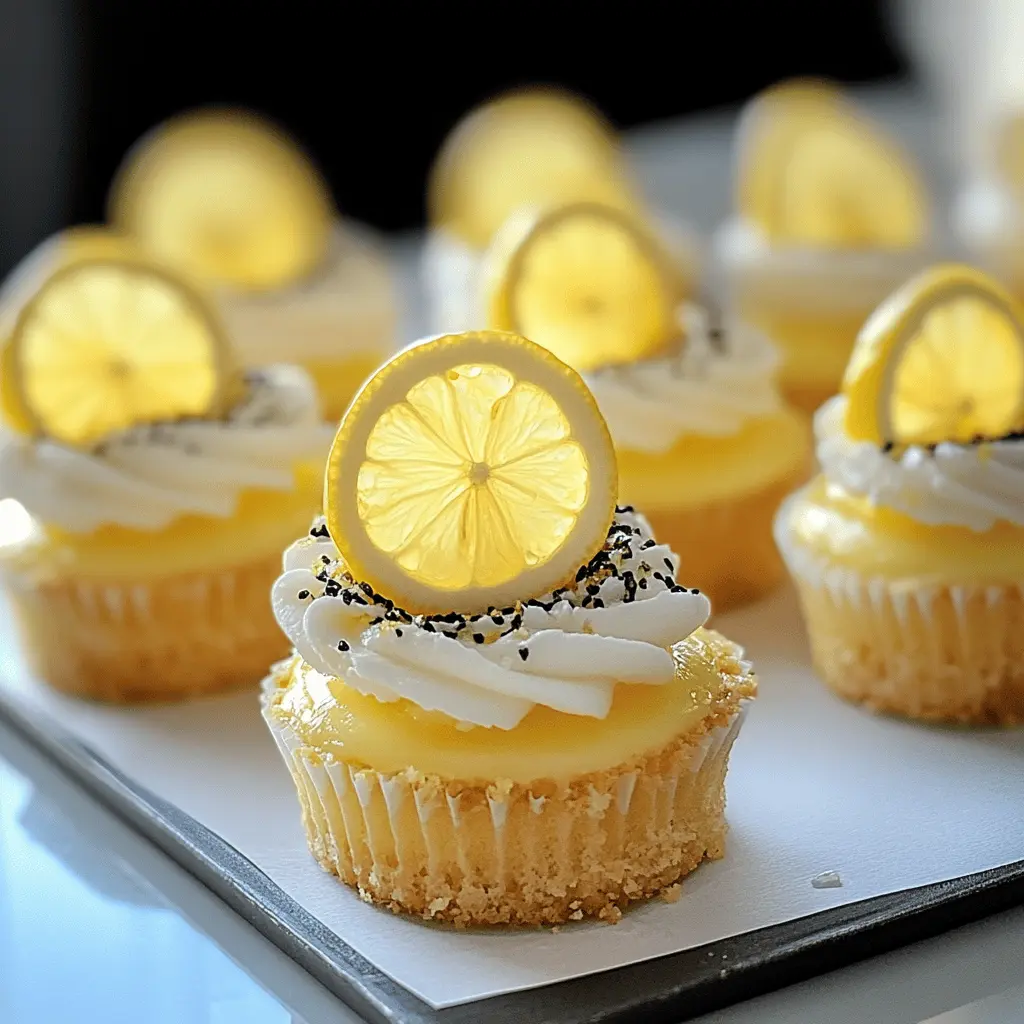
These mini lemon cheesecakes are a lovely treat, perfect for brightening your day! They have a creamy filling with a zesty lemon flavor, all nestled in a crumbly crust.
They’re cute, easy to make, and are great for sharing—if you can resist eating them all yourself! I love how they whip up quickly, making them a hit at any gathering!
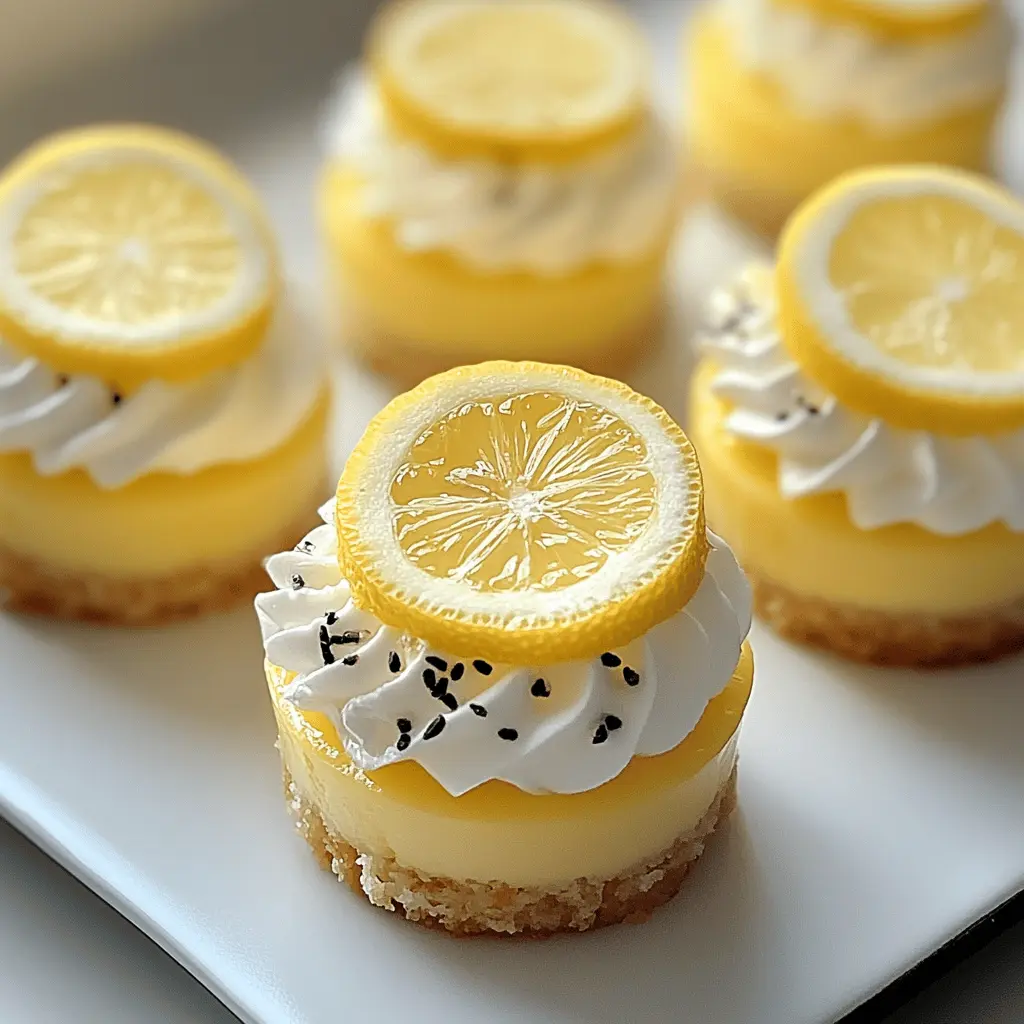
Key Ingredients & Substitutions
Graham Cracker Crumbs: These create a tasty crust. If you don’t have graham crackers, try using digestive biscuits or even crushed vanilla wafers for a different flavor.
Cream Cheese: It’s crucial for that creamy texture. If you’re looking for a lighter option, consider using Neufchâtel cheese, which has less fat but still delivers on flavor.
Sour Cream: It adds a nice tang. Full-fat Greek yogurt is a great substitute if you want to cut down on dairy. It will still give you that creamy consistency!
Lemon Zest and Juice: These are key for that fresh lemon flavor. If lemons aren’t available, bottled lemon juice will work, but fresh is always tastier. You can use lime as an alternative for a twist!
Heavy Cream: This is whipped to top your cheesecakes, giving a lovely finish. If you need a lighter option, try using whipped topping or even coconut cream for a dairy-free version.
How Do I Ensure the Cheesecake Center Sets Perfectly?
A common challenge with cheesecakes is making sure the center sets without becoming dry. Here are some tips:
- Keep an eye on the baking time. The cheesecakes should be slightly jiggly in the center when you take them out.
- Cooling them gradually helps. After baking, let them cool at room temperature before refrigerating to avoid cracking.
- Refrigerate for at least 2 hours. This helps them firm up nicely for serving.
With these steps, you’ll create perfectly creamy mini cheesecakes every time! Enjoy making them!
How to Make Mini Lemon Cheesecakes
Ingredients You’ll Need:
For the Crust:
- 1 cup graham cracker crumbs
- 1/4 cup unsalted butter, melted
- 2 tablespoons sugar
For the Cheesecake Filling:
- 8 oz cream cheese, softened
- 1 cup powdered sugar
- 1 teaspoon vanilla extract
- 1/2 cup sour cream
- Zest of 1 lemon
- 1/4 cup fresh lemon juice
For the Topping:
- 1/4 cup heavy cream
- Lemon slices, for garnish
- Poppy seeds, for garnish
- Fresh mint leaves, for garnish (optional)
How Much Time Will You Need?
This recipe will take about 30 minutes to prepare, plus an additional 2 hours for chilling in the refrigerator. It’s a simple process of mixing, baking, and then letting them cool and set up. Total time is about 2 hours and 30 minutes before serving. Perfect for a lovely dessert!
Step-by-Step Instructions:
1. Prepare the Muffin Tin:
Start by preheating your oven to 325°F (160°C). While the oven is warming up, line a muffin tin with cupcake liners to hold the mini cheesecakes.
2. Make the Crust:
In a medium bowl, combine the graham cracker crumbs, melted butter, and sugar. Mix everything together until it’s well combined and resembles wet sand. Take about a tablespoon of this mixture and press it firmly into the bottom of each cupcake liner to form a nice crust.
3. Make the Cheesecake Filling:
In a large mixing bowl, use a hand mixer to beat the softened cream cheese until it’s nice and smooth. Gradually add in the powdered sugar and vanilla extract, mixing until combined. Next, stir in the sour cream, lemon zest, and lemon juice, blending until the mixture is creamy and smooth.
4. Fill and Bake:
Spoon the cream cheese mixture over the crust in each cupcake liner, filling them about three-quarters full. Place the muffin tin in the preheated oven and bake for about 15-18 minutes, or until the centers are set but still slightly jiggly—this will help keep them creamy.
5. Cool and Chill:
Once they’re done baking, remove the cheesecakes from the oven and let them cool at room temperature for about 30 minutes. After that, pop them in the refrigerator to chill for at least 2 hours. This step is essential for getting that perfect creamy texture!
6. Whip the Cream and Garnish:
Before you’re ready to serve, whip the heavy cream in a separate bowl until soft peaks form. Then, using a piping bag or a spoon, add the whipped cream on top of each mini cheesecake. Lastly, garnish with a slice of lemon, a sprinkle of poppy seeds, and a mint leaf if you’re feeling fancy.
7. Serve and Enjoy!
Serve these delicious mini lemon cheesecakes chilled, and enjoy a burst of fresh lemony goodness!
Can I Use a Different Type of Crust?
Absolutely! If you don’t have graham cracker crumbs, you can substitute them with crushed butter cookies, vanilla wafers, or even ground almonds for a gluten-free option. Just remember to adjust the sugar level based on how sweet your substitute is!
Can I Make These Mini Cheesecakes Dairy-Free?
Yes, you can! Use dairy-free cream cheese and sour cream substitutes. For the heavy cream, try coconut cream whipped up until fluffy. Keep in mind that the taste and texture may vary slightly, but they’ll still be delicious!
How to Store Leftover Mini Cheesecakes?
Store any leftovers in an airtight container in the fridge for up to 4 days. If you prefer to freeze them, wrap each cheesecake tightly in plastic wrap and store them in a freezer-safe container for up to 2 months. Thaw in the fridge before serving and whip fresh cream to top them!
Can I Use Bottled Lemon Juice Instead of Fresh?
While fresh lemon juice is recommended for the best flavor, bottled lemon juice can be used in a pinch. Just make sure to use a good quality brand to avoid any artificial taste. You might want to adjust the amount of zest to match your preferred level of tartness!