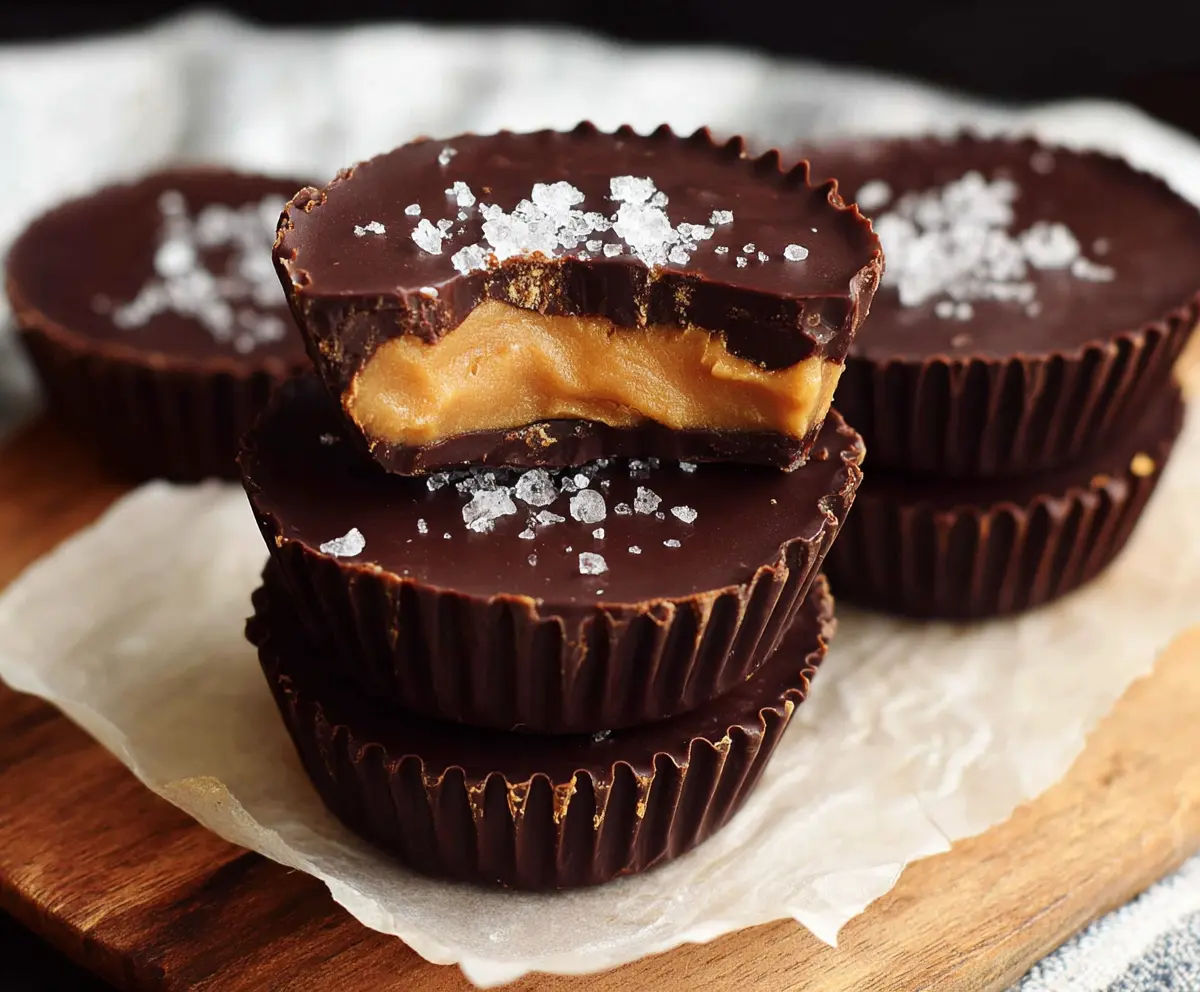
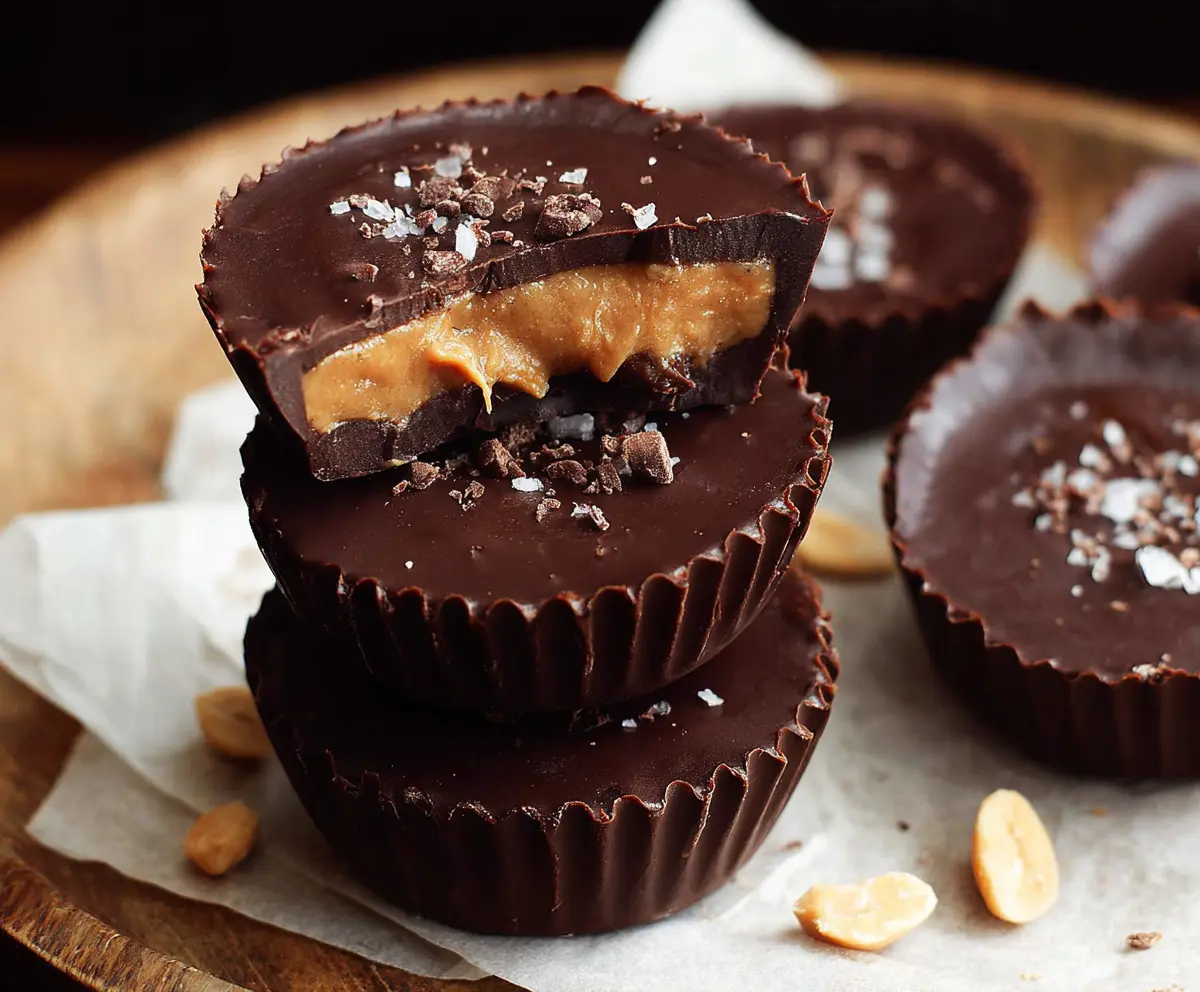
These Healthy Dark Chocolate Peanut Butter Cups are a delicious treat you can feel good about! They are made with rich dark chocolate and creamy peanut butter, giving you a perfect sweet and salty combo.
Making these cups is super simple! I love whipping up a batch for a snack. Plus, they’re great when you’re craving something sweet but want to keep it healthy. Who can resist that? 🍫🥜
Key Ingredients & Substitutions
Dark Chocolate: I recommend using chocolate with 70% cocoa or higher. It’s less sweet, making these cups healthier. If you prefer milk chocolate, you can substitute, but they will be sweeter. Just keep an eye on how much extra sweetness you add!
Peanut Butter: Natural, no-sugar-added peanut butter is best for a clean taste. If you’re allergic to peanuts, almond or cashew butter is a great alternative. Just make sure it’s creamy for the best texture.
Maple Syrup or Honey: This is optional, depending on how sweet you like your filling. If you’re vegan, go for maple syrup. For a lower-calorie option, you can use stevia or a sugar-free syrup.
Sea Salt: I love adding a pinch of sea salt on top for that sweet-salty flavor combo. You can use kosher salt if that’s what you have handy, but sea salt flakes look prettier!
How Do You Melt Chocolate Without Burning It?
Melting chocolate can be tricky since it burns easily. Here’s how to do it safely!
- Use a microwave-safe bowl and heat in short bursts of 20-30 seconds. Stir well in between until fully melted.
- If you notice any unmelted pieces, just stir them in, and the residual heat will do the trick.
- For an even safer method, you can use a double boiler. Just fill a pot with a little water, bring it to a simmer, and place a heat-safe bowl on top.
Take your time; the key is to go slow! This caramelizes the sugars, making the chocolate glossy and smooth. Happy melting!
Healthy Dark Chocolate Peanut Butter Cups
Ingredients You’ll Need:
- 1 cup dark chocolate chips (70% cocoa or higher for a rich, healthy chocolate)
- 1/2 cup natural creamy peanut butter (no added sugar or salt)
- 1-2 tbsp maple syrup or honey (optional, to sweeten the peanut butter)
- 1/2 tsp vanilla extract
- Pinch of sea salt (plus extra flakes for topping)
How Much Time Will You Need?
This recipe takes about 15 minutes of prep time and requires 30 minutes to chill in the freezer. So, you’ll spend some time preparing your ingredients and layering them up but can relax while they set. Enjoy the anticipation!
Step-by-Step Instructions:
1. Prepare the Muffin Tin:
Start by lining a muffin tin or small silicone mold with paper liners. This will help keep your cups intact when it’s time to enjoy them!
2. Melt the Dark Chocolate:
In a microwave-safe bowl, melt half of the dark chocolate chips. Heat them in 20-30 second intervals, stirring after each interval until the chocolate is smooth and melted. Be careful not to burn it!
3. Create the Chocolate Base:
Spoon a small amount of the melted chocolate into each liner, just enough to cover the bottom. Use the back of a spoon to spread it evenly. Once you’ve done this, place the tray in the freezer for about 10 minutes to let the chocolate set up.
4. Mix the Peanut Butter Filling:
While the chocolate base is setting, take a mixing bowl and combine the peanut butter with maple syrup (if you want added sweetness) and the vanilla extract. Stir until everything is well mixed and creamy.
5. Add the Peanut Butter Layer:
Once the chocolate base has hardened, spoon a dollop of your peanut butter mixture onto each chocolate base. Spread it gently, but make sure to leave a little space around the edges for the top chocolate layer.
6. Melt the Remaining Chocolate:
Now, melt the rest of the dark chocolate chips using the same method as before. This will make your delicious topping!
7. Top with Chocolate:
Spoon the melted chocolate over the peanut butter layer, covering it completely. No peanut butter should be showing!
8. Add Salt:
Sprinkle a small pinch of sea salt flakes on top of each cup. This adds a delightful burst of flavor!
9. Set in the Freezer:
Pop the tray back into the freezer for at least 30 minutes, or until the cups are fully set and solid.
10. Enjoy Your Treats:
When you’re ready to indulge, remove the peanut butter cups from the liners. Store any extras in the refrigerator until you’re ready for your next tasty treat!
Enjoy your delicious, healthy dark chocolate peanut butter cups! They’re the perfect balance of rich chocolate and creamy peanut butter with a hint of salt. Happy snacking!
Can I Use Milk Chocolate Instead of Dark Chocolate?
Yes, you can use milk chocolate if you prefer a sweeter flavor! Just be careful with the sweetness of the peanut butter, as milk chocolate is generally sweeter than dark chocolate.
How Should I Store the Peanut Butter Cups?
Store your peanut butter cups in an airtight container in the refrigerator for up to a week. If you want to keep them longer, you can also freeze them for up to 2 months. Just let them thaw in the fridge before enjoying!
Can I Substitute the Peanut Butter?
Absolutely! If you have peanut allergies or don’t like peanut butter, feel free to use almond butter, cashew butter, or sunflower seed butter. Just ensure they are also creamy for the best texture.
What If I Don’t Have Paper Liners?
No worries! If you don’t have paper liners, you can grease the muffin tin well with coconut oil or non-stick spray to help easily release the cups after they set. Just be sure to let them cool completely before removing.