
These cheese and cracker cups are a fun and tasty snack! With crispy crackers filled with creamy cheese, they’re perfect for parties or an easy treat at home.
Making them is a breeze—just layer cheese in your favorite crackers, and you’re ready to munch! I love serving them as a light appetizer or enjoying them while binge-watching my favorite shows. 🧀😋
Key Ingredients & Substitutions
Cheddar Cheese: Shredded cheddar forms the base of your crispy cups. If you’re looking for a different flavor, try using gouda or pepper jack for a kick!
Nuts: Chopped nuts add a great crunch. If you’re allergic, use crushed crackers or leave them out altogether. Sunflower seeds are a nice alternative too!
Cream Cheese: This gives a rich, creamy texture to the filling. For a lighter option, you can use low-fat cream cheese or a vegan cream cheese alternative.
Sour Cream or Greek Yogurt: Both add creaminess and tang. Swap Greek yogurt for extra protein if you want a healthier twist or use plain yogurt if that’s what you have.
Chives and Green Onions: They add fresh flavor. Feel free to substitute with finely chopped cilantro or parsley if you want a different herb touch.
How Do You Create Perfect Cheese Cups?
Making the cheese cups is crucial for this recipe’s success. Here’s how to perfect them:
- Preheat your oven to 375°F (190°C) to ensure even cooking.
- Spread the shredded cheese into thin, even circles on parchment paper to help the cheese cups hold their shape.
- Watch closely as they bake, usually 5-7 minutes is enough. They’ll be ready when the edges start to turn golden brown.
- Work quickly but carefully to shape the warm cheese into cups before they cool and harden.
These steps ensure you get that crispy, perfect shape for your cheese and cracker cups! Happy cooking!
Cheese And Crackers Cups
Ingredients You’ll Need:
For the Cheese Cups:
- 1 cup shredded cheddar cheese (for the crispy cups)
- 1/4 cup finely chopped nuts (optional, e.g., almonds or pecans)
For the Creamy Filling:
- 1 cup cream cheese, softened
- 1/4 cup sour cream or Greek yogurt
- 1 tbsp fresh chives or green onions, finely chopped
- 1/2 cucumber, peeled and finely diced
- 1 apple, peeled and finely diced
- 1/4 tsp dried herbs (thyme or dill works well)
- Salt and pepper to taste
For the Garnish:
- Cubed semi-hard cheese like gouda or cheddar (about 1 cup)
- Fresh grapes for garnish
- Small herb sprigs for garnish (e.g., fresh rosemary or thyme)
- Square crackers for garnish
How Much Time Will You Need?
This delightful recipe takes about 15 minutes of prep time and 10 minutes of baking. Plus, a little time to assemble the cups. So, in total, you’ll need about 30 minutes from start to finish!
Step-by-Step Instructions:
1. Make Cheese Cups:
First, preheat your oven to 375°F (190°C). Line a baking sheet with parchment paper. Take your shredded cheddar cheese and mix it with chopped nuts if you want some extra crunch. Now, place small mounds (about 2 tablespoons each) on the sheet, spreading them into thin, round circles. Bake them for around 5-7 minutes until the edges are nice and crispy and golden. Once they are done, take them out of the oven and let them cool slightly. While they are still warm and soft, gently lift each cheese crisp and press them into the bottom and sides of small clear cups or a muffin tin to form a cup shape. Let them harden as they cool.
2. Prepare Filling:
In a large bowl, mix your softened cream cheese with the sour cream or Greek yogurt. Add in the chives, herbs, salt, and pepper. Use a fork or an electric mixer and beat everything until it’s smooth and creamy. This is going to be the delicious filling for your cups!
3. Layer Filling:
Next, gently fold in the finely diced cucumber and apple, stirring just enough to combine everything. Then, spoon a layer of this mouthwatering mixture into the bottom of each cheese cup. This layer will add a fresh flavor that pairs perfectly with the cheese.
4. Add Cubed Cheese:
Now it’s time to add some more delicious cheese! On top of the cream cheese and fruit layer in each cup, sprinkle in the small cubes of semi-hard cheese. This adds a wonderful texture and flavor contrast to your cups.
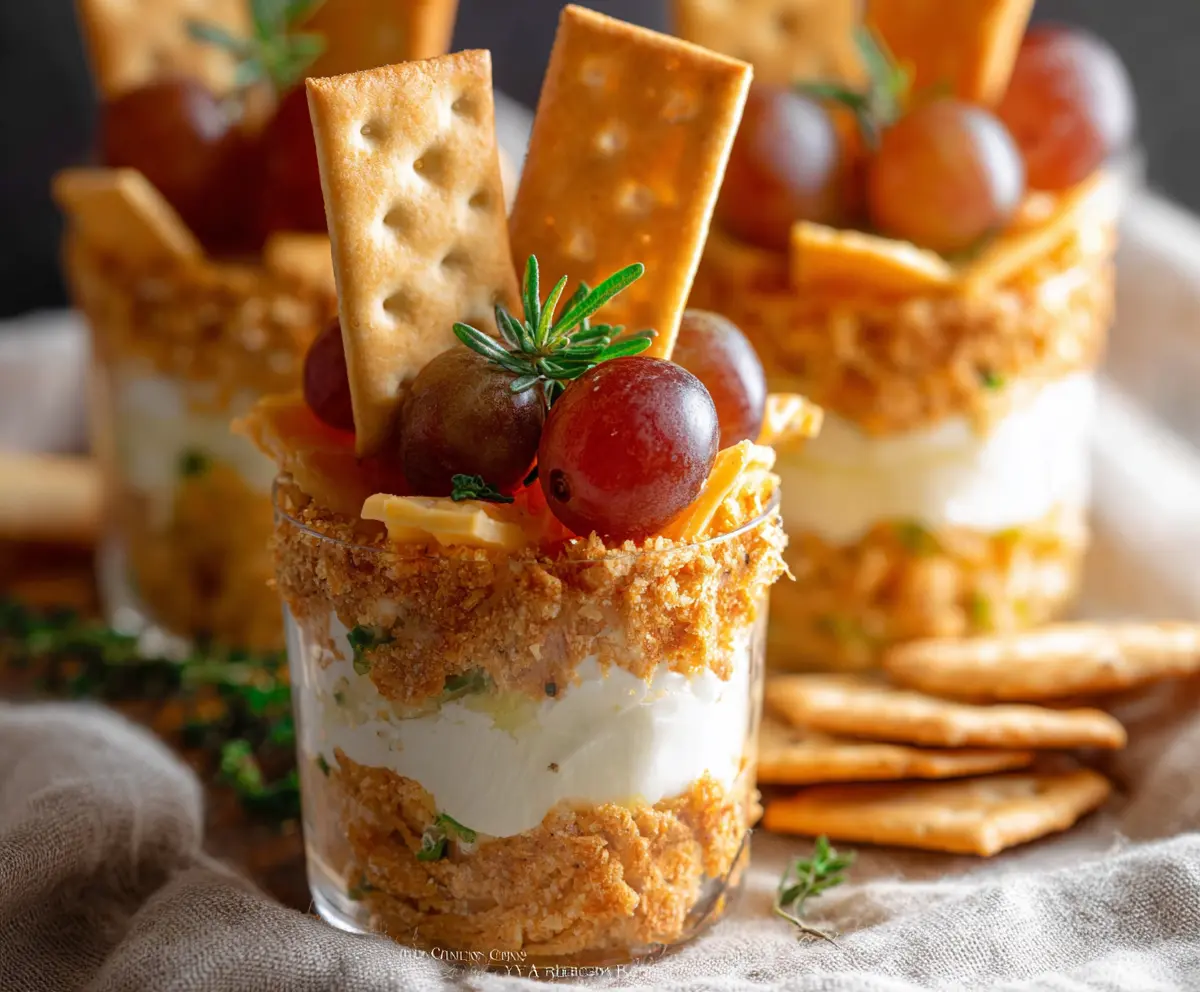
5. Garnish:
For that final touch, insert a square cracker into each cup and place a fresh grape on top. This not only adds color but also a fun bite-sized crunchy element! Don’t forget to add a small herb sprig for that extra pop of elegance.
6. Serve:
Give your cups a brief chill in the fridge if you like before serving them, and enjoy these beautiful, easy appetizers! They are perfect for parties, game day, or just a classy snack at home.
Enjoy your Cheese and Crackers Cups—a perfect blend of crispy, creamy, and fruity—great for any occasion!
Can I Use Different Types of Cheese for the Cups?
Absolutely! While cheddar is great for its melting properties, you can experiment with other cheeses like gouda, mozzarella, or even a sharp cheese like parmesan for a different flavor profile. Just be sure to shred or finely grate them for the best results.
How Do I Store Leftover Cheese Cups?
If you have any leftovers, store them in an airtight container in the fridge for up to 2 days. To maintain the crispiness of the cheese cups, it’s best to keep the filling separate and assemble them right before serving.
Can I Make These Cheese Cups Gluten-Free?
Yes! To make these cups gluten-free, just ensure that your crackers are gluten-free. Many brands offer gluten-free crackers that would work perfectly for the garnishing step.
What Other Fillings Can I Use?
You can definitely get creative with the fillings! Consider adding diced bell peppers, olives, or even a layer of pesto for an Italian twist. Just keep the balance of creamy and crunchy elements in mind for the best texture!