These fall-off-the-bone ribs are grilled to perfection and packed with flavor! Tender and juicy, they will definitely be the highlight of your barbecue.
When the ribs are done, you’ll be licking your fingers and wondering how you ever lived without them. Plus, they’re super easy to make—just throw them on the grill!
Key Ingredients & Substitutions
Baby Back Ribs: This dish works best with baby back ribs, known for their tenderness. If unavailable, spare ribs or St. Louis-style ribs can be used, but they may need longer cooking times.
Apple Juice: The juice adds moisture and sweetness while the ribs cook. If you don’t have any on hand, try using beer or chicken broth as a substitute for a different flavor profile.
Barbecue Sauce: Choose your favorite barbecue sauce for personal flair. I like a tangy sauce, but you can use a sweet, smoky, or even a spicy sauce based on your taste. Homemade sauces are also great!
Cayenne Pepper: This adds a kick! If you prefer milder ribs, just skip it or substitute with paprika for a smoky flavor without the heat.
How Do I Remove the Membrane from the Ribs?
Removing the membrane from the ribs is key for tenderness and flavor. To do this:
- Start by placing the ribs, bone-side up, on a cutting board.
- Use a sharp knife to slide under one edge of the membrane. Be gentle so you don’t cut into the meat.
- Once you have a section loosened, grab it with a paper towel for better grip and slowly pull it away in one piece.
If it tears, don’t worry—just pull off what you can. Your ribs will still turn out amazing!
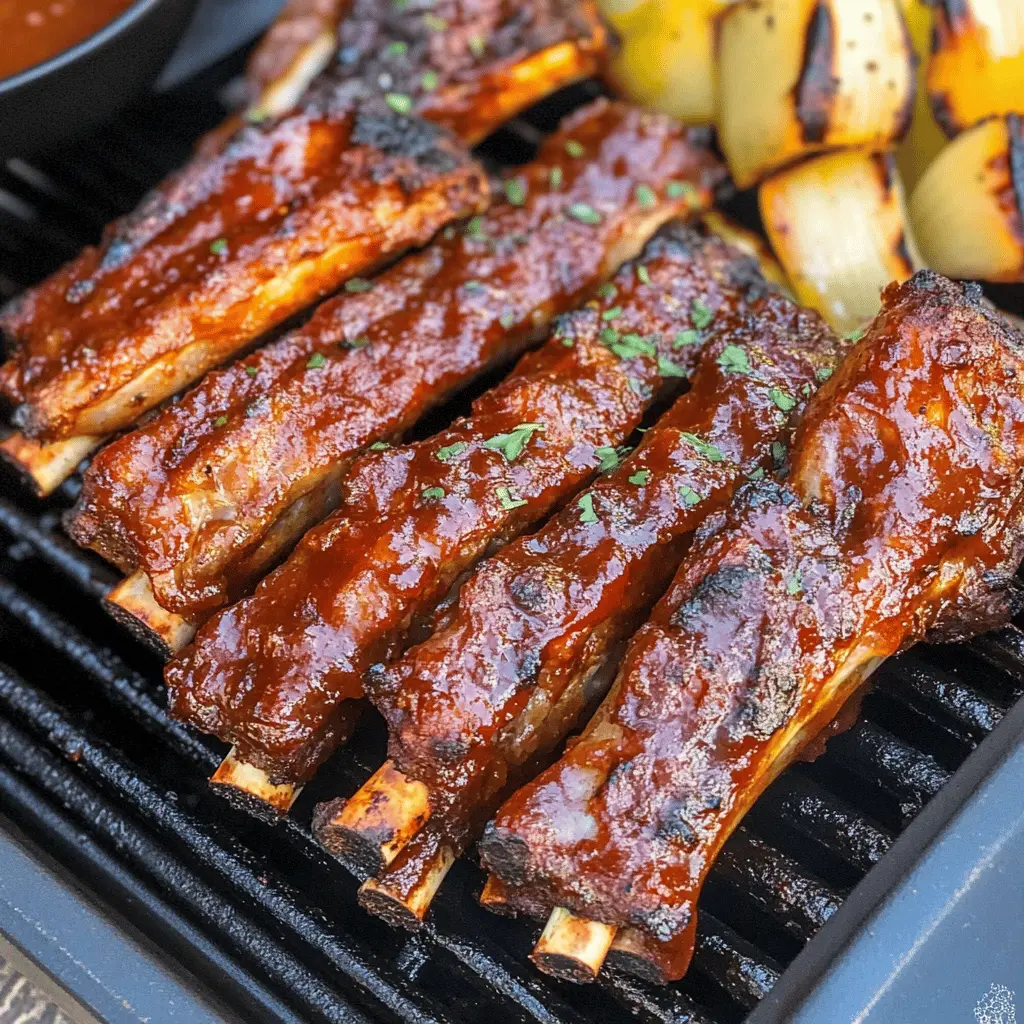
Fall Off The Bone Ribs On The Grill
Ingredients You’ll Need:
For the Ribs:
- 2 racks of baby back ribs
- 1 cup apple juice (for wrapping)
- 1 cup barbecue sauce (your choice)
For the Dry Rub:
- 2 tablespoons of olive oil
- 2 tablespoons paprika
- 1 tablespoon garlic powder
- 1 tablespoon onion powder
- 1 tablespoon brown sugar
- 1 tablespoon chili powder
- 1 teaspoon black pepper
- 1 teaspoon salt
- 1 teaspoon cayenne pepper (optional, for heat)
How Much Time Will You Need?
This delicious rib recipe will take about 4 to 5 hours in total. You’ll spend about 30 minutes on prep, followed by 4 hours of cooking. Just relax and let your grill do its magic while you enjoy the aroma!
Step-by-Step Instructions:
1. Preparing the Ribs:
Start by removing the membrane from the back of the ribs if it hasn’t been taken off already. Just slide a sharp knife under the membrane at one end and pull it off gently. This helps the ribs be more tender and flavored.
2. Make the Dry Rub:
In a small bowl, mix together the olive oil, paprika, garlic powder, onion powder, brown sugar, chili powder, black pepper, salt, and cayenne pepper. This flavorful combination will be your dry rub. Mix well until it forms a paste.
3. Apply the Dry Rub:
Generously rub the mixture all over the ribs, ensuring every part is well-coated. Let the ribs sit at room temperature for about 30 minutes to 1 hour to soak in those wonderful flavors.
4. Preheat the Grill:
While the ribs are resting, go ahead and preheat your grill to medium heat, aiming for around 250°F to 275°F. This will ensure the ribs cook evenly and slowly.
5. Grill the Ribs:
Once your grill is heated, place the ribs on it with the bone-side down. Grill for about 2 hours, keeping an eye on the temperature to maintain it steady. If you’re using a smoker, feel free to toss in some wood chips for extra flavor!
6. Wrap and Steam:
After 2 hours, it’s time to wrap the ribs. Lay each rack of ribs on a large piece of aluminum foil and pour half a cup of apple juice over them. Wrap them tightly to create a steam pocket, then return them to the grill.
7. Continue Cooking:
Cook the wrapped ribs for another 2 hours. This steaming step helps make the meat super tender, so they literally fall off the bone.
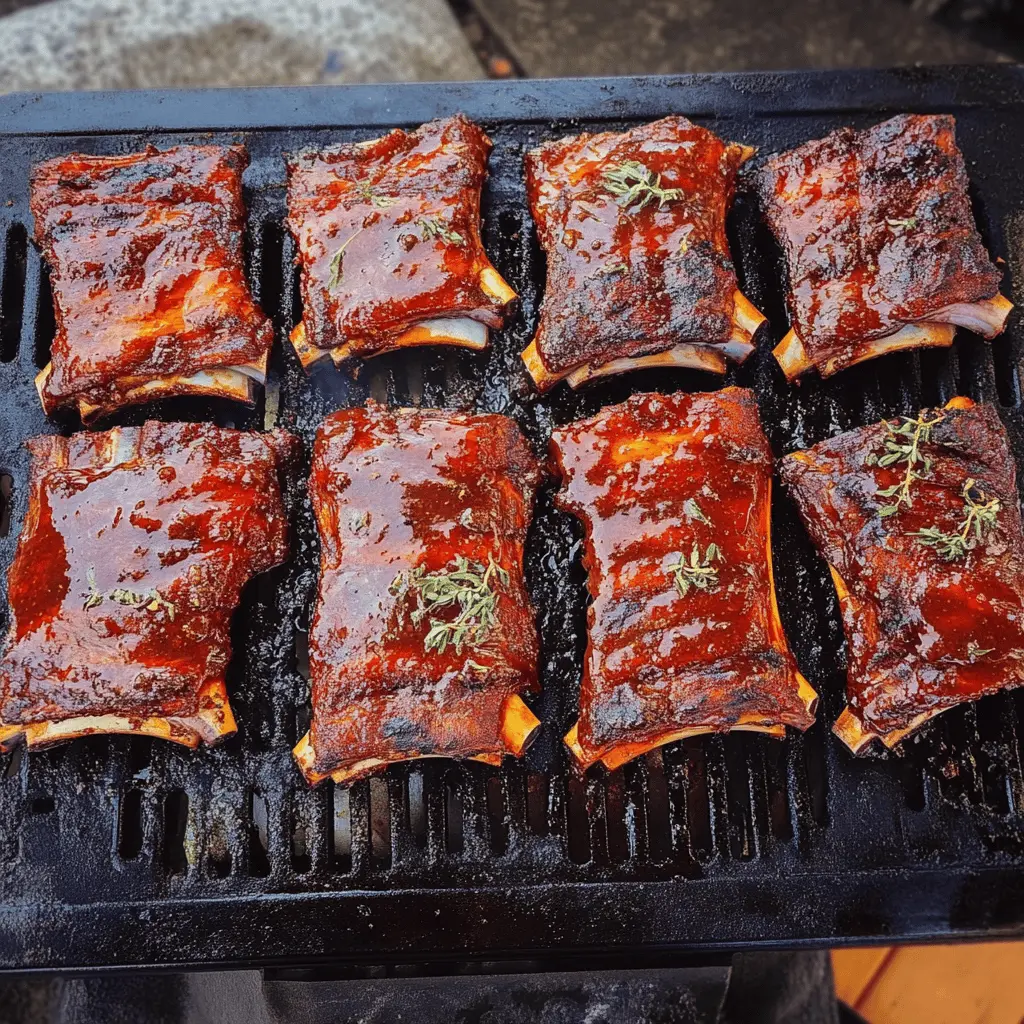
8. Apply the Barbecue Sauce:
After the steaming time, carefully unwrap the ribs (watch out for steam!). Brush your favorite barbecue sauce generously over the ribs to give them that delicious glaze.
9. Final Grilling:
Now, return the ribs to the grill for an additional 30 minutes to an hour. During this time, turn the ribs and brush on more barbecue sauce every 15 minutes. This gives the ribs a lovely caramelized finish!
10. Rest and Serve:
Once the ribs look gloriously glazed and have a nice bark, take them off the grill and let them rest for about 10 minutes. This helps keep them juicy. After resting, slice them into sections.
11. Enjoy!
Serve the ribs hot, and don’t forget to offer extra barbecue sauce on the side for those who want even more flavor. Enjoy your fall-off-the-bone grilled ribs!
Can I Use Different Types of Ribs for This Recipe?
Absolutely! While baby back ribs are recommended for their tenderness, you can also use spare ribs or St. Louis-style ribs. Just remember that cooking times may vary; spare ribs may take longer due to their thicker meat, so adjust your grilling time accordingly.
What If I Don’t Have Apple Juice?
No worries! You can substitute apple juice with other liquids like chicken broth, beer, or even a mix of water and a splash of vinegar for a similar steaming effect. This helps keep the ribs moist while they’re cooking!
How Do I Store Leftover Ribs?
Store leftover ribs in an airtight container in the fridge for up to 4 days. To reheat, wrap them in aluminum foil with a bit of moisture (like water or extra barbecue sauce) and warm them in the oven at 300°F until heated through, about 20–30 minutes.
Can I Make the Dry Rub Ahead of Time?
Yes! You can prepare the dry rub in advance and store it in an airtight container for up to a month. This makes it convenient for when you’re ready to grill, just grab your pre-mixed rub and go!